If you are going to make a PDF in Photoshop CS4, this post deserves your attention. It offers you the steps to make a PDF in Photoshop CS4. Besides, it also gives you an alternative – MiniTool PDF Editor, to make PDF files.
There are multiple ways to make a PDF file. For instance, you can create PDFs from a Word Doc, via the Google Chrome browser, or with the help of online/offline PDF makers. Here, we would like to share an extra method for PDF creation with you.
This post provides you with a tutorial on how to make a PDF in Photoshop CS4.
How to Make a PDF in Photoshop CS4
You can generate a PDF by using Photoshop CS4 (PS). As you know, PS is mainly built to create, design, and edit images. What you don’t know is that it also offers you a chance to make a PDF. It doesn’t matter if you don’t know how to do that.
In this section, we will tell you how to make and save PDF files in Photoshop. Here are the detailed steps for doing that. Just follow them to finish the process.
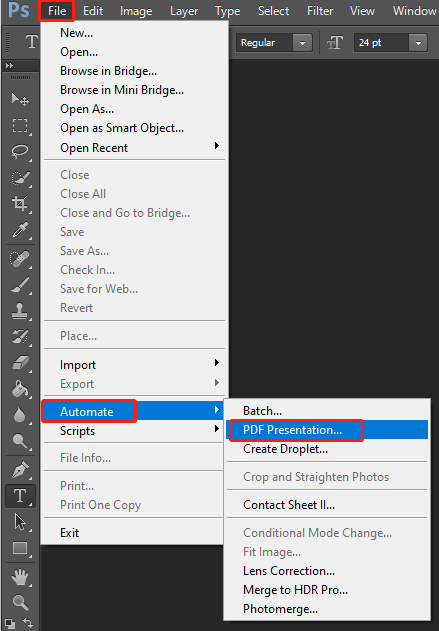
Step 1: After you open Photoshop on your computer, click File > Automate > PDF Presentation.
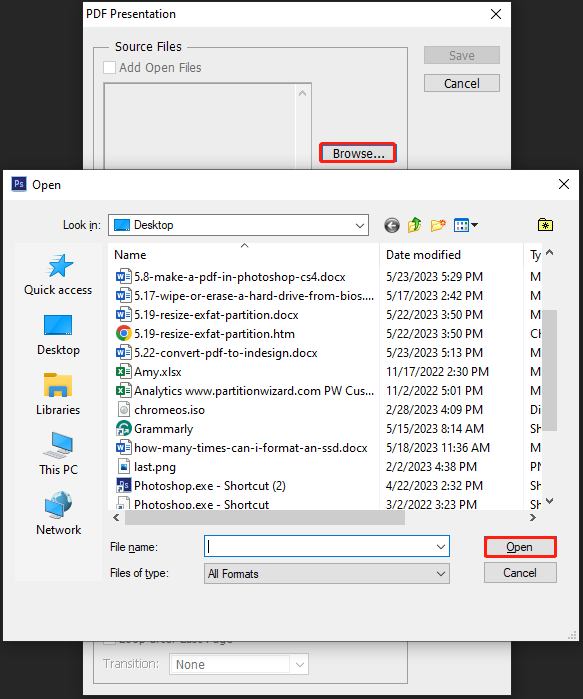
Step 2: In the prompted window, click Browse. Then locate and select the item you want to use in the pop-up window. After that, click Open to confirm the operation.
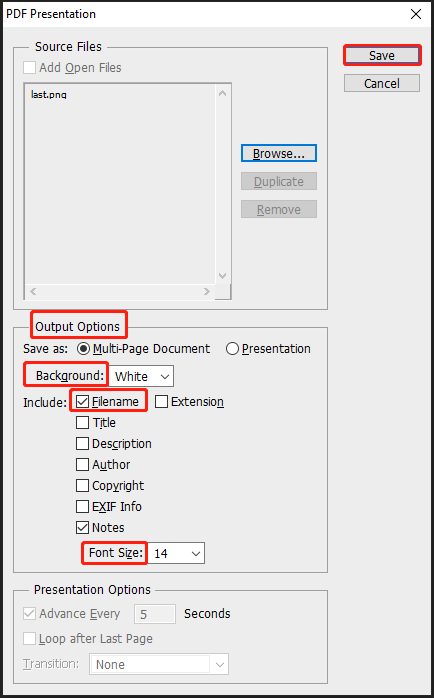
Step 3: Configure the settings based on your demands and then click the Save button.
- Click either Multi-Page Document or Presentation.
- Select a background color from the drop-down menu.
- Choose a desired font size from the drop-down menu.
- Select file information like the Filename and Description to display.
- If possible, pick presentation options such as Advance Every, Loop after Last Page, and Transition.
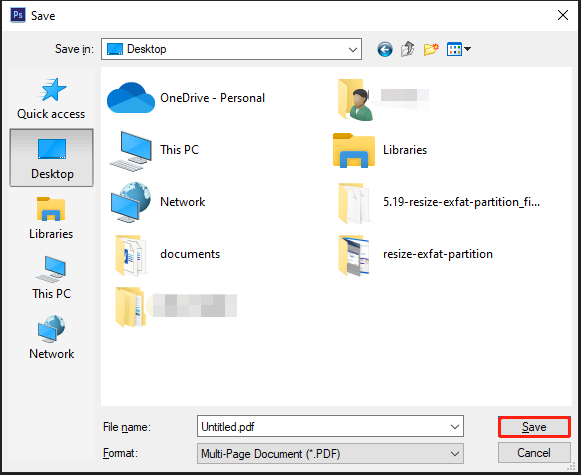
Step 4: In the pop-up window, assign a place to save the PDF file, enter a file name, and click the Save button to continue. That’s how to save PDF files in Photoshop.
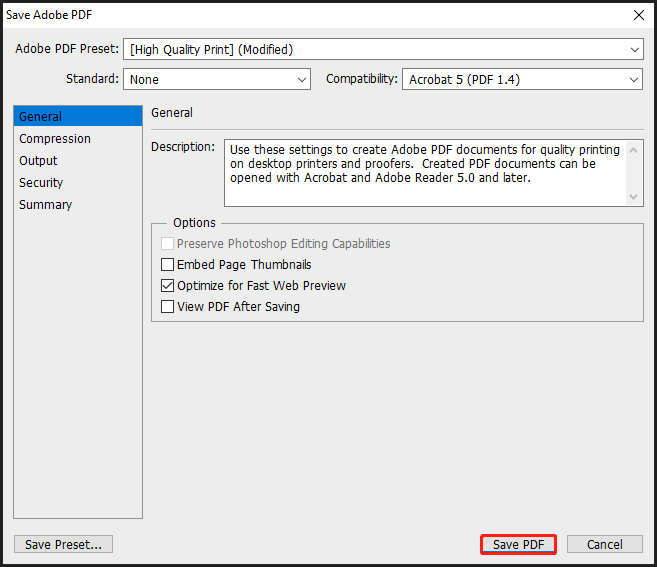
Step 5: In the next window, configure PDF settings further and then click Save PDF to end the process.
Now, you can see the created PDF file at the place where you saved it.
MiniTool PDF Editor Helps You Make PDFs
MiniTool PDF Editor is a professional PDF editing tool, which helps you create, open, edit, convert, merge, split, password protect, and share PDFs. Simply put, it allows you to perform various operations related to PDF files. Besides, it also includes an image converter, enabling you to convert image formats and convert items like HEIC/Word/Excel/PPT/CAD to images easily.
MiniTool PDF EditorClick to Download100%Clean & Safe
Download and install MiniTool PDF Editor on your computer. Then launch it and click the Open tab in the left panel. Then you will see 5 options in the prompted window. It means that you can create PDFs from blank, image, file, CAD, and scanner. According to your situation, select a suitable option and follow the on-screen instructions to create PDFs.

After that, save the created PDF. To do that, right-click on the new PDF, click Save as, and follow the prompted wizard to finish the process. Alternatively, open the MiniTool drop-down menu, and then click Save as and do what prompts you to end the operation.