An invoice is a commercial document sent by a seller to a buyer that requests payment for goods or services. It details the products or services provided, the total amount owed, payment terms, and a due date.
For businesses, invoices can be used for expense reimbursement, accounting, and tax filing. They are important documents for tax and audit purposes.
The invoice is usually sent before payment. If a buyer doesn't pay an invoice, you can politely remind them, terminate the service, or even file a lawsuit.
2. Receipts are different from invoices. They are sent after payment and don’t have legal effect.
As a seller or service provider, how to make an invoice? You can refer to the following 2 methods.
Method 1. Use Accounting or Payment Software to Create an Invoice
If your business has a huge scale, you may need an automated and professional system to create and send invoices, such as QuickBooks, PayPal, Wave, Zoho, and other professional accounting or payment software.
How to Create Invoices via QuickBooks
- On the app, click + New or + Create > Invoice.
- Add customer and product/service information.
- Review all the items (email address, invoice date, due date, terms, etc.) and change them if necessary.
- On the right panel, there are tools to help you customize your invoice.
How to Create Invoices via PayPal
- From the PayPal app: Tap Request > Send an invoice to get paid. Fill in the details: who you are billing, what they're paying for, and add any notes or attachments. Review your invoice and tap Send.
- From the website: Click Send and Request > Send an invoice. Fill in the details, review your invoice, and click Send.
How to Create Invoices via Zoho
- Click Sales > Invoices.
- Set your transaction preferences.
- Click Save & Continue.
- Fill in the details and review them.
- Save it as a draft or save and send it.
How to Create Invoices via Wave
- Sign up for Wave.
- Expand Sales & Payments and click Invoices.
- Click Create an invoice.
- Fill in the details and review them.
- Click Save and continue.
- If the invoice draft is OK, click Approve draft.
- It will ask you whether to Turn on Payments. You can keep the Online Payments OFF.
- Then, click Send invoice.
Method 2. Make an Invoice via Templates
How to make an invoice manually? Here are 2 approaches.
#1. Use Invoice Templates in Word, Excel, or Google Sheets
You can use Microsoft Word, Microsoft Excel, or Google Sheets to create an invoice, because they offer some invoice templates. Here is the guide:
Microsoft Word/Excel
- Click File > New.
- Type “invoice” in the search bar and press Enter.
- Select a template and click Create.
- Fill in the details and review them.
- Save it as a PDF or other proper file formats and then send it to your clients via email or other sharing software.
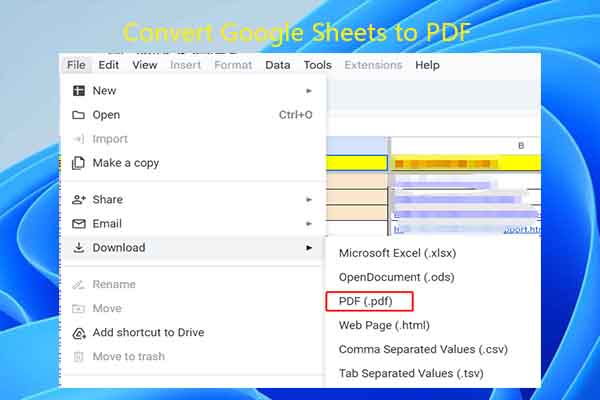
Google Sheet
- Sign in to Google Sheets.
- Under Template gallery > General, click Invoice.
- Fill in the details and download it as a PDF.
- Then, send it to your clients.

#2. Download an Invoice Template from Google and Edit It
Microsoft Word/Excel and Google Sheets only offer limited templates. If you want other types of invoice templates, you can search for invoice templates on Google and download them. For more options, visit these five invoice template websites.
The downloaded invoice template could be a Word, Excel, or PDF file. If it is a PDF file, you can use MiniTool PDF Editor to edit it. This software is able to add your company logo, add or erase text, add a stamp, add a signature, etc. Here is how to edit invoice templates via software:
MiniTool PDF EditorClick to Download100%Clean & Safe
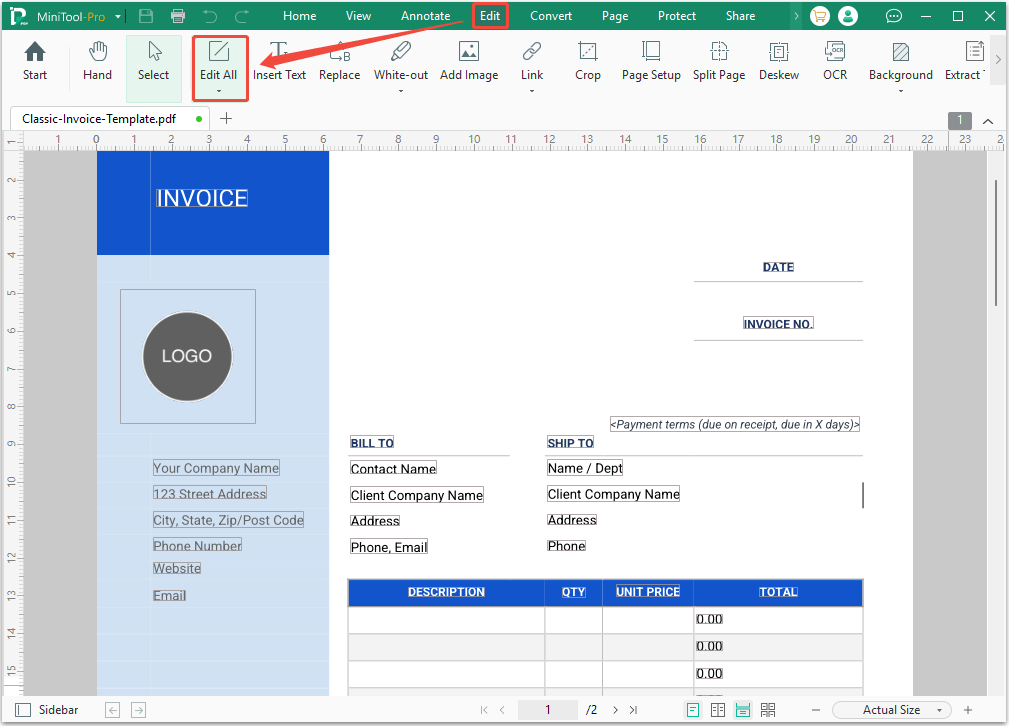
Step 1: Modify existing text.
- Download and install this software.
- Right-click the invoice PDF template and select Open with > MiniTool PDF Editor.
- Once the file opens in MiniTool PDF Editor, click Edit > Edit All.
- Then, all editable text will be framed. Click the box to change the text.
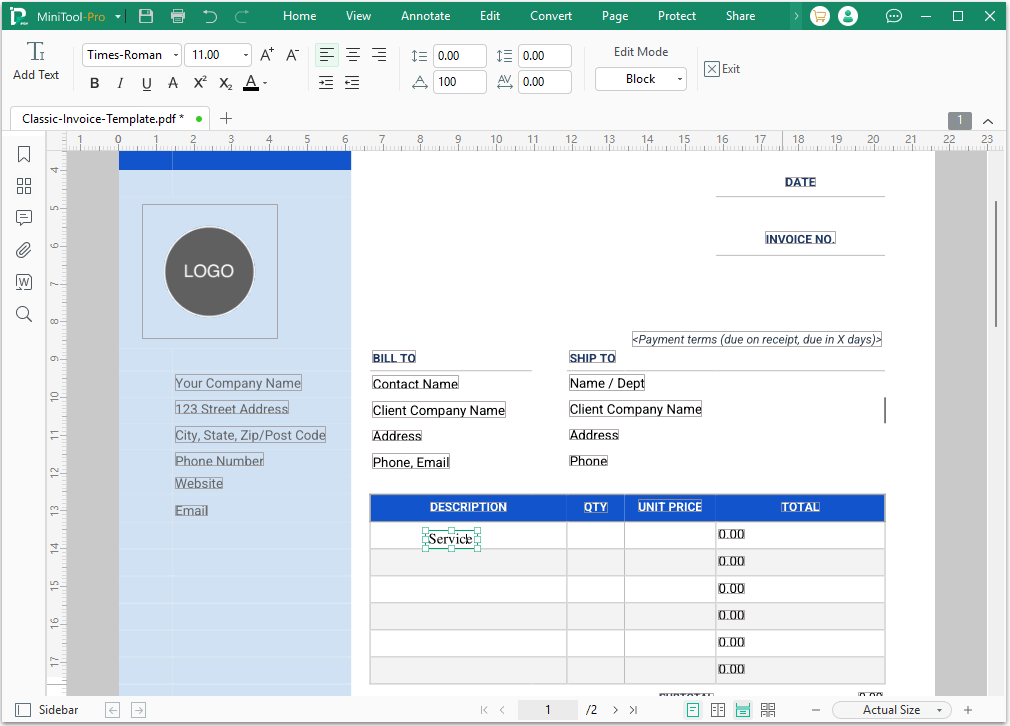
Step 2: Insert new text.
- Select the Insert Text option.
- Use the cursor to click the place where new text is to be added. A box will appear.
- Type the text.
- Change the text’s font, size, and other parameters.
- Drag the box to adjust the location of the text.
Step 3: Insert your company’s logo.
- Click Add Image, and then select your company’s logo to open.
- Click to place the image.
- Drag the image to adjust its location.
- Change its size by dragging the frame of the image or selecting the Size feature and then typing the width and length.
- There are other image editing features, such as rotate left or right, replace image, and transparency.

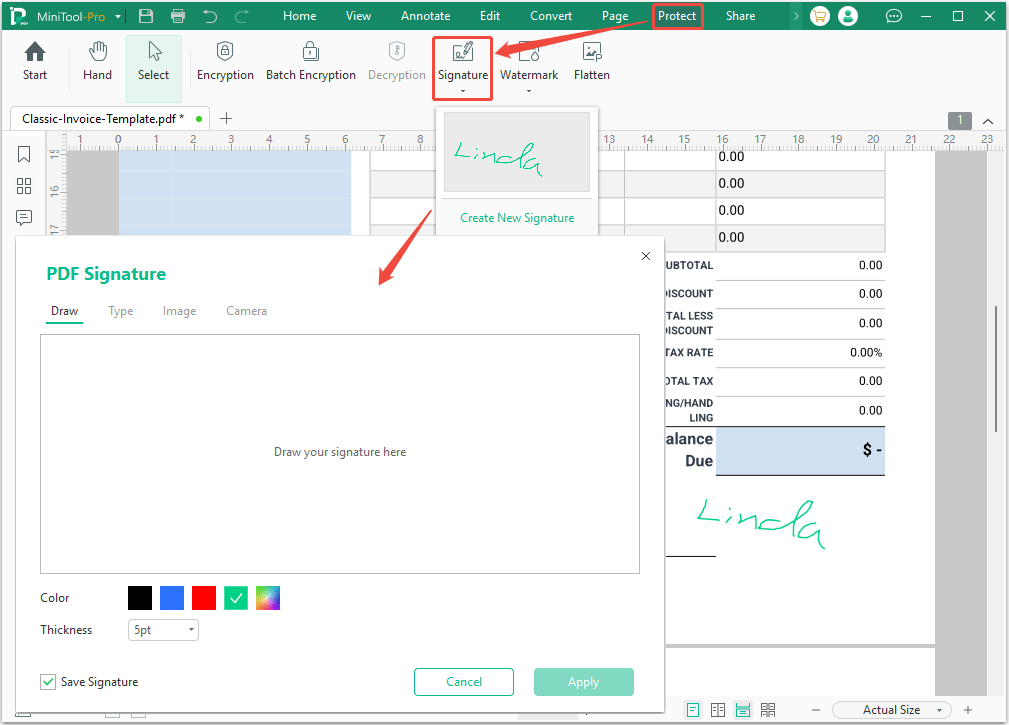
Step 4: Add a signature.
- Click Protect > Signature > Create New Signature.
- On the pop-up window, create a signature by drawing, typing, adding an image, or using your camera. Then, click Apply.
- Once the signature is created, use the cursor to place the signature.
- Adjust the signature just like you would an image.
Invoice Structure: Basic Elements and Information
To edit invoice templates, you should know what information needs to be added. Here are some basic elements and information about an invoice.
- The “Invoice” Label: A label clearly visible at the top, distinguishing the invoice from other documents such as quotations or receipts.
- Unique Invoice Number: A sequentially unique identifier for each invoice, used for tracking, record keeping, and referencing specific transactions.
- Invoice Date: The date the invoice was issued, crucial for determining the payment due date and accounting period.
- Seller Information: The company's full legal name, address, contact details (telephone, email, website), and the company logo.
- Buyer Information: The customer's full legal name, address, and contact details. For businesses, this may include a specific contact person or department.
- Description of Goods or Services: A detailed list of the goods sold or offered. Each item should include the description, quantity, unit price, and row total.
- Subtotal: The sum of all items before taxes or discounts.
- Applicable Taxes: Any sales tax, value-added tax, or other levies should be clearly broken down.
- Discount (if applicable): Any reduction applies to the total amount.
- Total Payable: The final amount the buyer needs to pay, displayed prominently.
- Payment Terms: Agreed payment terms, including due date, acceptable payment methods, and any late payment penalties or early payment discounts.
- Payment Instructions: Detailed information on how to make payment (bank account details, payment portal link, cheque mailing address).
Bonus Tip: How to Save Invoice as PDF
The PDF file format is usually used in formal files, including invoices. After creating an invoice, you may want to save it as a PDF file and then send it to your client.
How to save invoice as PDF? Here is the guide:
- For accounting or payment software: Use the Download PDF or Print button to save the invoice as a PDF.
- For Microsoft Word/Excel: Click File > Save As. Select a save location and then change the Save as type to PDF (*.pdf).
- For Google Sheet: Click File > Download > PDF (.pdf).
Bottom Line
This post shows you how to make an invoice using QuickBooks, PayPal, Zoho, and Wave accounting and payment software, and using invoice templates downloaded from Google Chrome and offered by Word, Excel, and Google Sheets.
If you get an invoice PDF template, try using MiniTool PDF Editor to edit it. For any questions or problems, contact us via [email protected].
About The Author

Position: Columnist
Linda has been working as an editor at MiniTool for 5 years. She is always curious about computer knowledge and learns it crazily. Her articles are simple and easy to understand. Even people who do not understand computer can gain something. By the way, her special focuses are disk management, data recovery and PDF editing.