In some cases, you may want to convert image to CAD. To execute this conversion, you need an image to CAD converter like MiniTool PDF Editor. Here, this post introduces how to perform the conversion between image and CAD with this converter step by step. You can take a look at it.
What Is a CAD File
A CAD (computer-aided design) file is a digital document that is created by a piece of CAD software like AutoCAD. It contains a blueprint, technical drawing, schematic, or 3D rendering of an object and is often used by designers, engineers, manufacturers, scientists, and digital artists. A CAD file can be created in various formats, such as DXF, DWG, DWF, and so on.
If you have an image and want to open and edit it in a CAD program in DWG or DXF format, you should consider performing the image to CAD conversion. How can you convert image to CAD? This post provides a complete guide on this image to CAD conversion. Just keep reading.
How to Convert Image to CAD
When it comes to converting image to CAD, MiniTool PDF Editor is recommended as a great image to CAD converter. This converter can help convert an image to either DWG or DXF.
In addition to an image to CAD converter, MiniTool PDF Editor can also be used as a PDF editor, PDF converter, and image converter with a wide range of features. For instance, you are capable of using this program to merge/split PDFs, convert PDFs to Word/Excel/PPT/CAD/EPUB and vice versa, convert an image to JPG/PNG/BMP/ICO, rotate/crop PDFs, etc.
Converting image to CAD with MiniTool PDF Editor is not a direct operation and will be divided into two parts.
Part 1: Convert Image to PDF
First of all, you should convert the target image to PDF. Here’s a step-by-step guide on how to execute this operation.
Step 1: Click the following button to download MiniTool PDF Editor on your PC. Keep in mind this program is compatible with 32-bit or 64-bit Windows 11, 10, 8.1, 8, 7, and XP.
MiniTool PDF EditorClick to Download100%Clean & Safe
Step 2: Once the image to CAD converter download is finished, find and double-click the downloaded setup file in File Explorer.
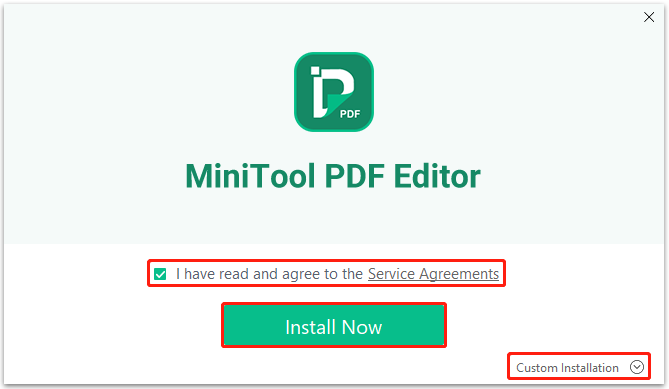
Step 3: Tick the checkbox next to the I have read and agree to the Service Agreements option and then click Install Now to install this app on your desktop.
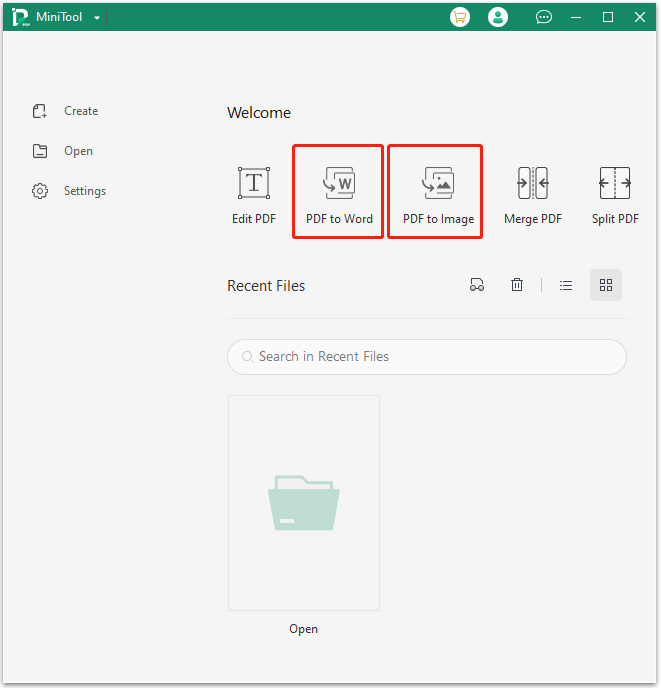
Step 4: After you install this image to CAD converter successfully, click Start Now to launch this program and enter its main interface.
Step 5: Click PDF to Word or PDF to Image to continue.
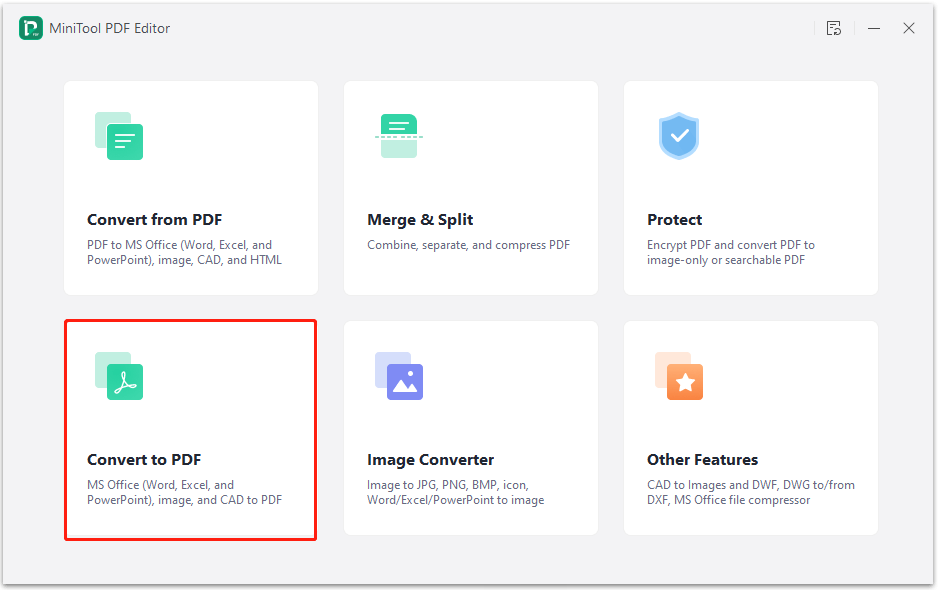
Step 6: In the pop-up window, click More Features at the bottom-left corner and then click Convert to PDF.
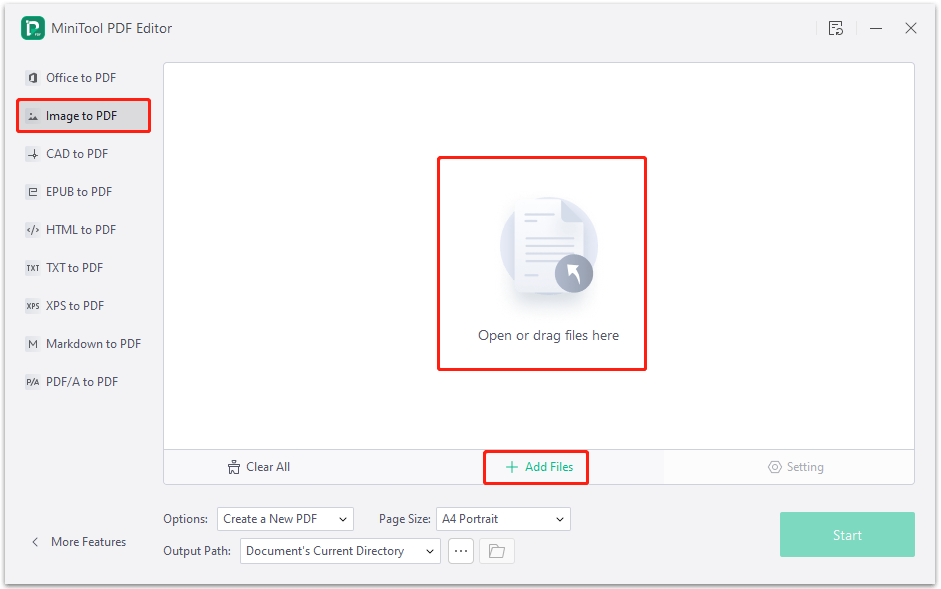
Step 7: In the next window, switch to Image to PDF. Then open the image you want to convert in the following three ways:
- Click Open or drag files here, find and select the target image in the prompted window, and then click Open.
- Click Add Files, choose the target image from the Open window, and then click Open.
- Directly drag and drop the target image into this program.
Step 8: After uploading the image, you can change some settings for better conversion.
- Options: Select Create a New PDF or Create Multiple PDF Documents according to your needs.
- Page Size: Choose a preferred page size for the converted PDF file in this section.
- Output Path: Decide where to save the converted PDF file by selecting Document’s Current Directory, Default Path, or Desktop from the drop-down menu. Alternatively, you can click the three dots icon to select a different output path.
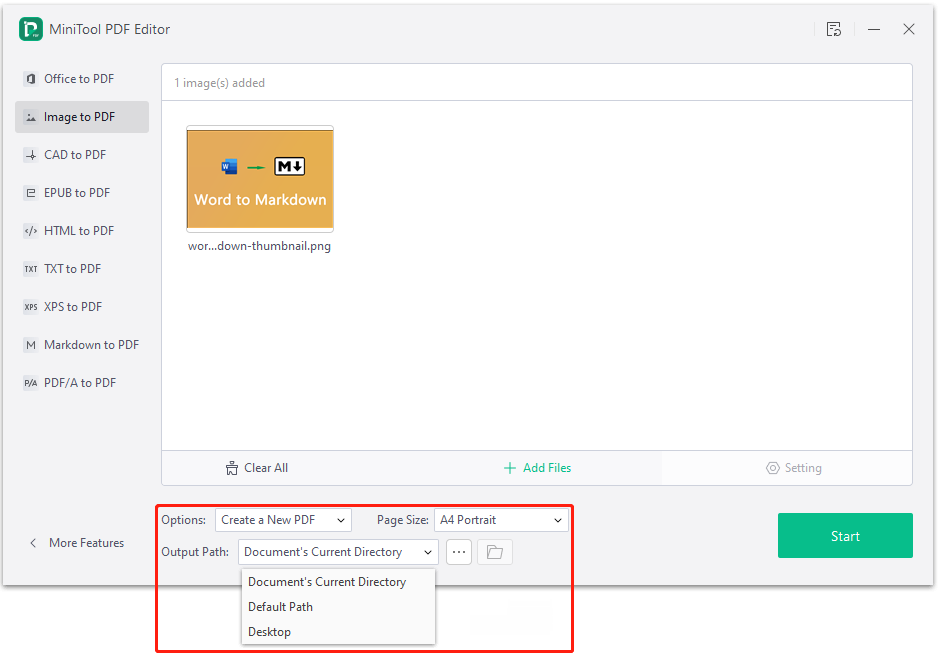
Step 9: Once done, click Start to begin this conversion.
Part 2: Convert PDF to CAD
After you complete the image to PDF conversion, you can find the converted file from the output path you selected before. Then follow the steps below to convert PDF to CAD.
Step 1: Launch MiniTool PDF Editor again and then select PDF to Word or PDF to Image.
Step 2: In the pop-up window, navigate to More Features > Convert from PDF > PDF to CAD.
Step 3: After that, upload the target PDF file to this program. Then select dwg or dxf as the output format and choose a location to save the converted CAD file.
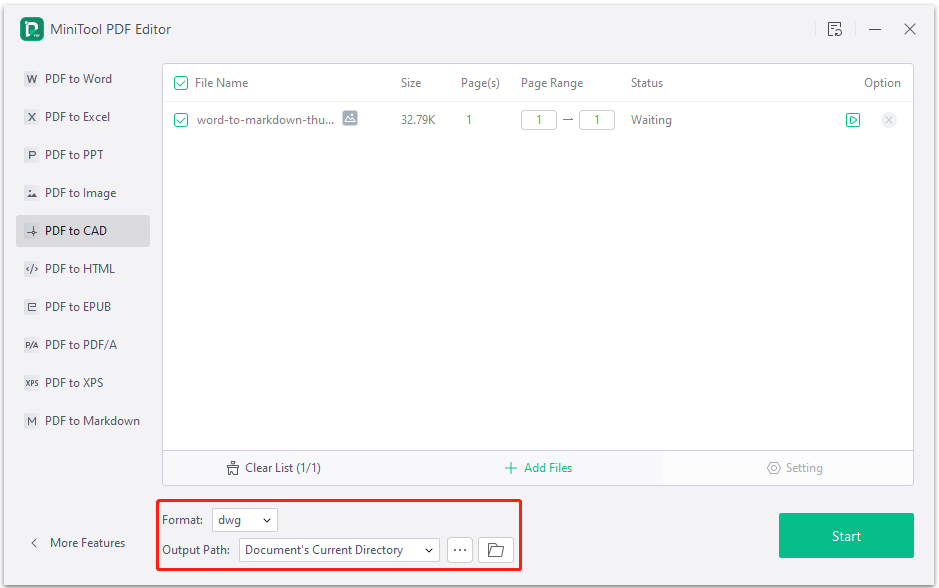
Step 4: At last, click Start to execute this PDF to CAD conversion.
Further reading:
In addition to converting image to CAD with MiniTool PDF Editor, you can also choose an online converter to perform this conversion. By doing so, you don't need the image to CAD converter download. Here we summarize several effective online image to CAD converters.
- Convertio
- OnlineConvertFree
- AnyConv
- Online Converter
Bottom Line
This post introduces how to convert image to CAD with MiniTool PDF Editor step by step. When you are trying to perform this conversion, you can follow the given steps. If you have any problems with this conversion, you can leave a message in the comment part below.
For any issues related to MiniTool PDF Editor, you can contact us via [email protected]. We’ll reply to you as soon as possible.