Adobe Acrobat is a family of application software and Web services developed by Adobe Inc. to view, create, manipulate, print and manage Portable Document Format (PDF) files. The basic Acrobat Reader, available for several desktop and mobile platforms, is freeware.
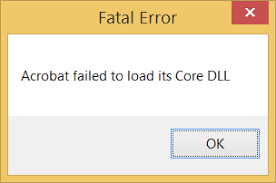
You may encounter the Acrobat failed to load core DLL error when launching Adobe Acrobat or Acrobat Reader. If so, keep reading to get the solutions.

Way 1. Repair Acrobat Reader
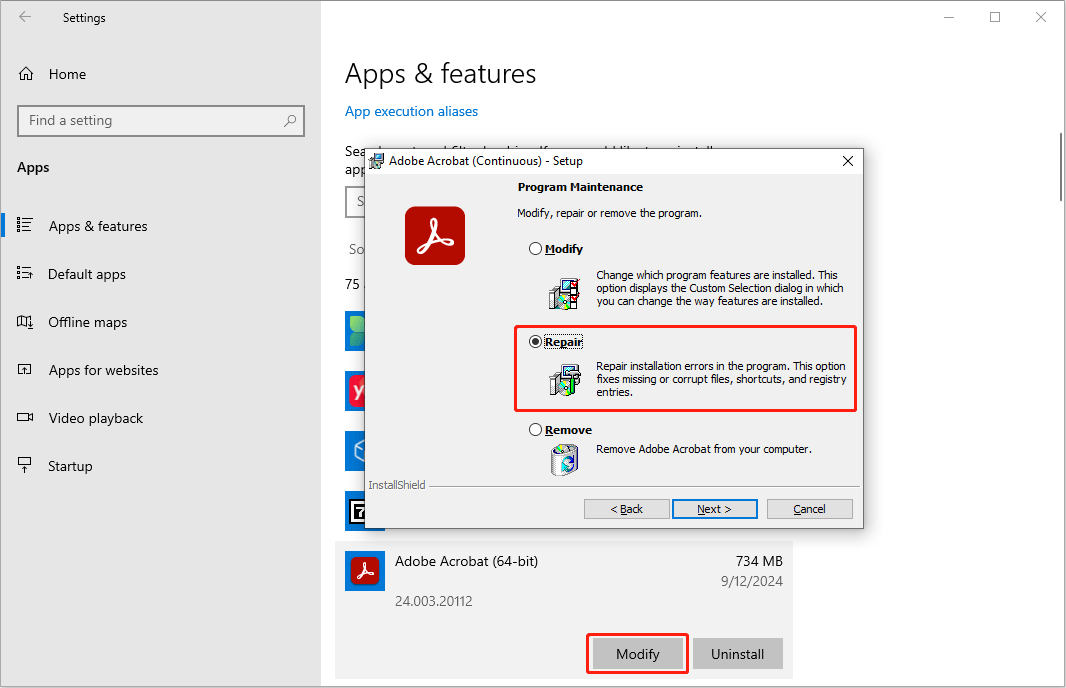
Sometimes, the “Fatal Error Acrobat failed to load its core DLL” is due to missing or corrupted DLL files. Then, repairing the software installation can replace the corrupt files with new ones. This may solve the error. Here is the guide:
- Press the Windows logo key + I to open Settings.
- Go to Apps > Apps & features.
- Scroll down the right pane to find Adobe Acrobat or Acrobat Reader and then click it.
- Click the Modify button. The Adobe Acrobat setup window will pop up.
- Click Next, select Repair and click Next, and then click Update to repair the Adobe Acrobat installation.

Way 2. Scan Your System for Malware or Rootkit
Do you get the Acrobat failed to load core DLL error even if you don’t use Adobe Acrobat or after you uninstall it? If so, you should consider the issue is caused by malwares. In addition, some malwares or rootkits may interfere with the running of Adobe Acrobat, causing the Fatal Error Acrobat failed to load its core DLL.
In a word, when you get the Fatal Error Acrobat failed to load its core DLL, running an antivirus scan is necessary. If you are using Windows Defender, do the following:
- Open Settings and go to Update & Security > Windows Security.
- Click the Open Windows Defender Security Center button in the right window.
- Go to Virus & threat protection and click Quick Scan.
If you using third-party antivirus software, you can open it to run a scan.
Way 3. Disable Protected Mode
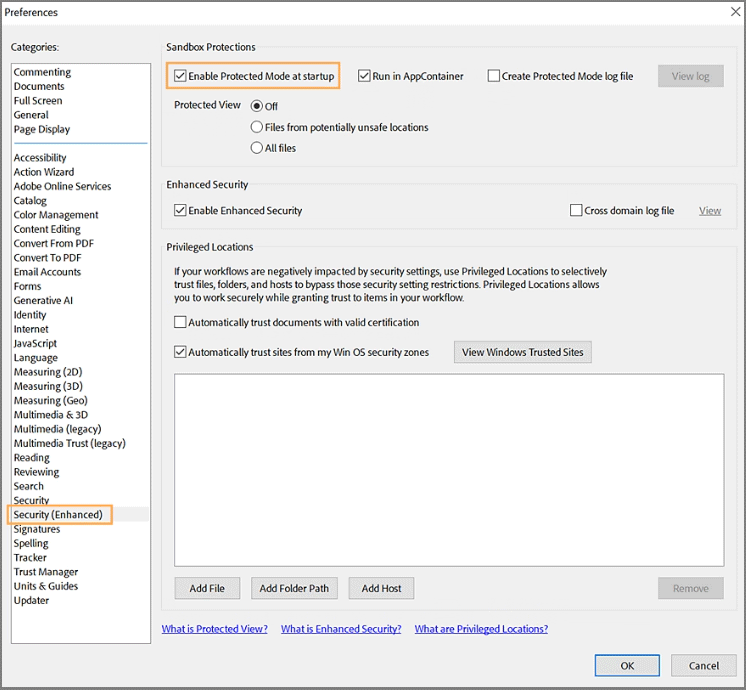
The Acrobat failed to load core DLL error may be also related to inadequate permissions. Then, you can try disabling the protected mode. Here is the guide:
- Launch Adobe Acrobat or Adobe Acrobat Reader and select the hamburger icon > Preferences.
- From the left menu, select Security (Enhanced).
- Under Sandbox Protections, uncheck the Enable Protected Mode at startup checkbox.
- In the dialog that appears, select Yes.
- Select OK.

Way 4. Uninstall and Reinstall Adobe Acrobat
If all the above methods don’t work, you can try uninstalling Adobe Acrobat and then reinstalling it. You can uninstall this software from Settings or Control Panel. Then, go to the installation place to ensure there is no residual file.
After that, download the Adobe Acrobat to install it again. Ensure that Adobe Acrobat or Adobe Acrobat Reader is installed on the local system drive. Installing on a mapped drive isn't a supported configuration.
Bottom Line
Have you gotten the Fatal Error Acrobat failed to load its core DLL? This error may be due to the Adobe Acrobat issues or malwares. Don’t worry. This post offers you 4 simple ways to solve this issue. Just have a try.


![How to Fix Adobe The Document Could Not Be Printed? [6 Ways]](https://images.minitool.com/pdf.minitool.com/images/uploads/2024/02/adobe-the-document-could-not-be-printed-thumbnail.jpg)