Why do you need to convert image to HTML? How to do that? This post from MiniTool PDF Editor offers you 4 ways. Some of them are free. You can choose one according to your condition.
Why Do You Need to Convert Image to HTML?
HTML, short for HyperText Markup Language, is a standard markup language for creating web pages. HTML, CSS, and JavaScript are usually used together to design the user interface of web pages, web applications, and mobile applications.
What are HTML files? An HTML file’s file extension is .html. If you check its properties, you can see its type of file is Chrome HTML Document. The default opener of this file is Google Chrome or other browsers.
However, if you want to share this HTML with other people, you need to host this HTML file on a web server. Then, web browsers can receive this HTML document from the web server and then render the documents into visual multimedia web pages.
HTML files are easier to share with others. Therefore, if you want to share a picture with more people, you can convert image to HTML and then share this link with others. Other people can also search for this picture online.
How to Convert Image to HTML
To convert image to HTML, you can use the following ways.
Way 1. MiniTool PDF Editor
MiniTool PDF Editor is a PDF editing tool. You can use it to write and draw on a PDF; add notes, images, shapes, stamps, attachments, watermarks, and links to PDF; split/merge/compress PDFs, etc. In addition, it also offers a Convert feature, allowing you to convert PDFs and images.
With the Convert feature, you can convert PNG to HTML, JPG to HTML, TIF to HTML, BMP to HTML, and HEIC to HTML. Here is the guide:
MiniTool PDF EditorClick to Download100%Clean & Safe
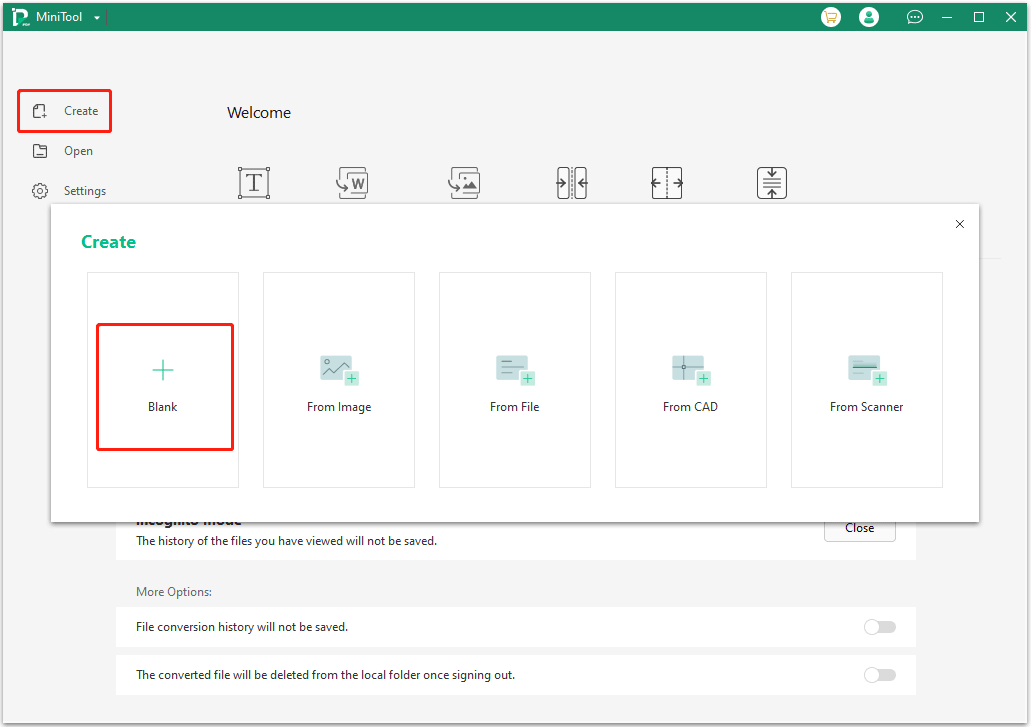
Step 1: Launch MiniTool PDF Editor and click Create > Blank. The convert feature is only available after you open a PDF file. Therefore, you need to create a blank PDF file first.
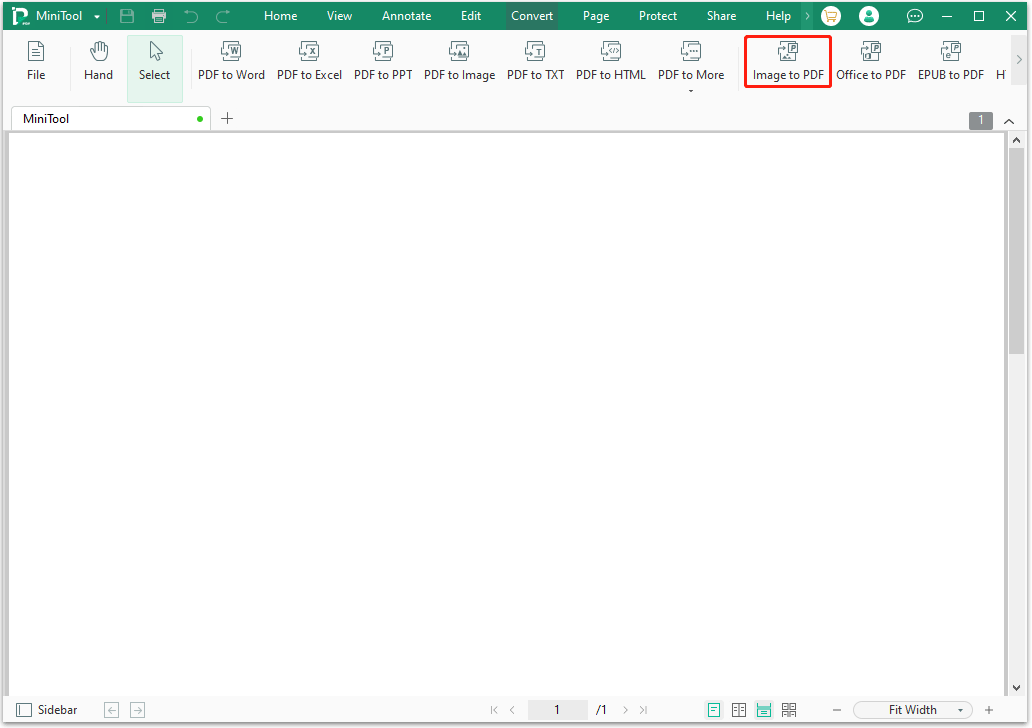
Step 2: Go to the Convert tab and click Image to PDF. This will open a new window.
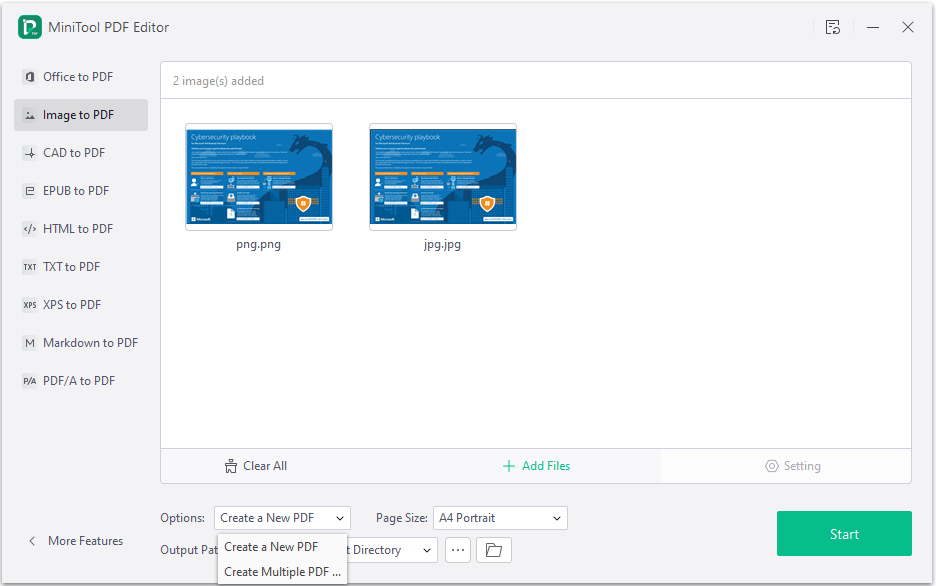
Step 3: On the new window, click Add Files to select images. You can select multiple images. If multiple images are selected, change the Options to Create Multiple PDF Documents. Otherwise, all images will be merged into one PDF file. Then, change the Page Size if necessary. Click Start.
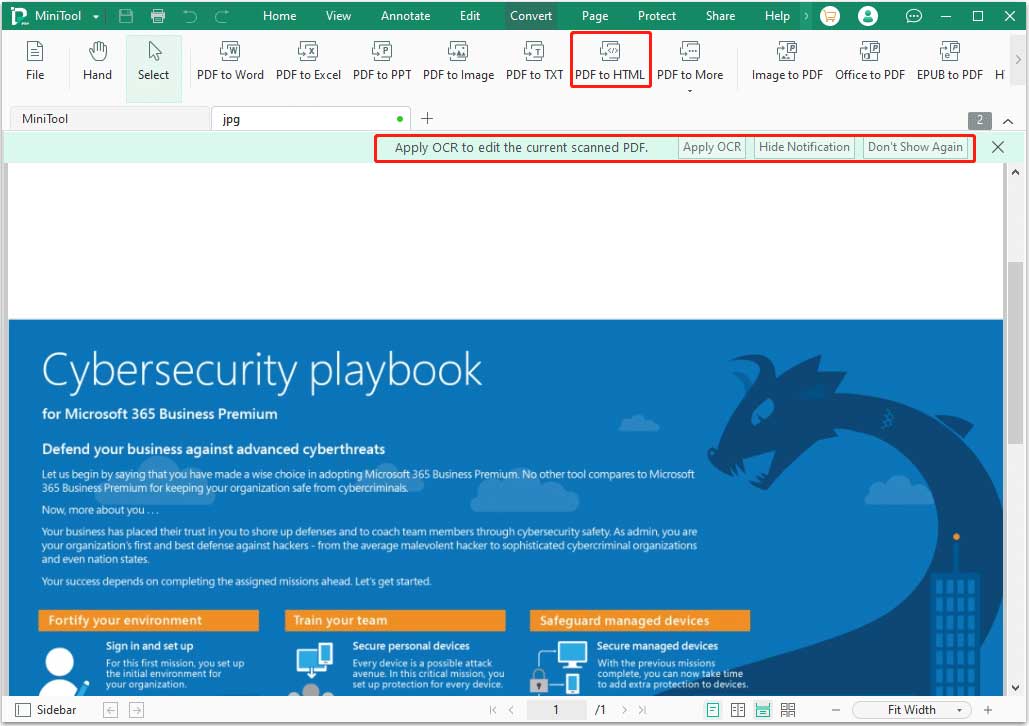
Step 4: New PDF files will open automatically. It will ask you whether to apply OCR (Optical Character Recognition). If you want to change the characters in the picture, you can apply this feature. Otherwise, go to the Convert tab and click PDF to HTML directly.
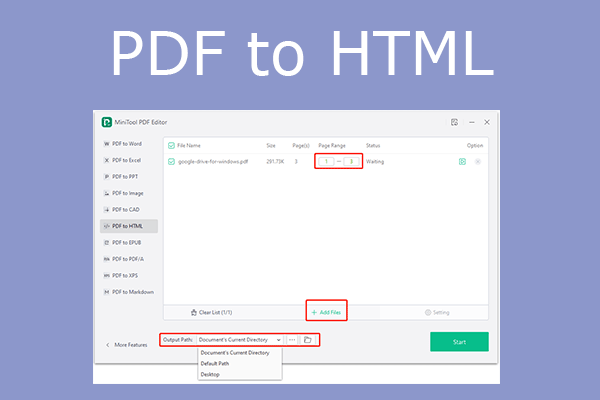
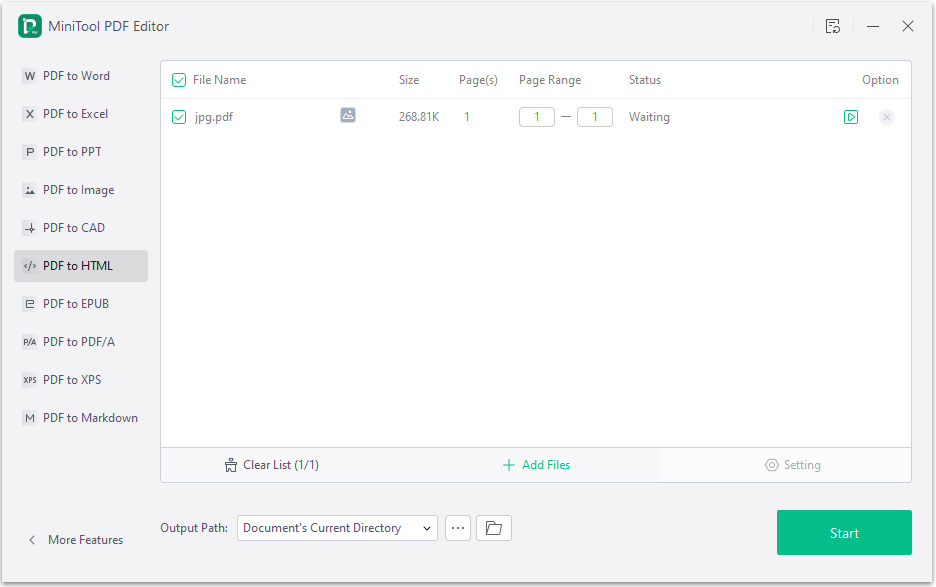
Step 5: On the PDF to HTML interface, click Add Files to select the PDFs that you converted just now. Then, click Start to convert them to HTML files.
Way 2. Google Docs
Google Docs can open PNG, JPG, or other common image files and then save them as HTML files. In addition, it can also extract text from these images. Therefore, if you want to convert JPG to HTML and PNG to HTML, this tool is also OK. Here is the guide:
- Sign in to Google Drive.
- Click New > File upload to upload an image to Google Drive.
- Right-click the image and choose Open with > Google Docs. It will display the image and extract text from the image.
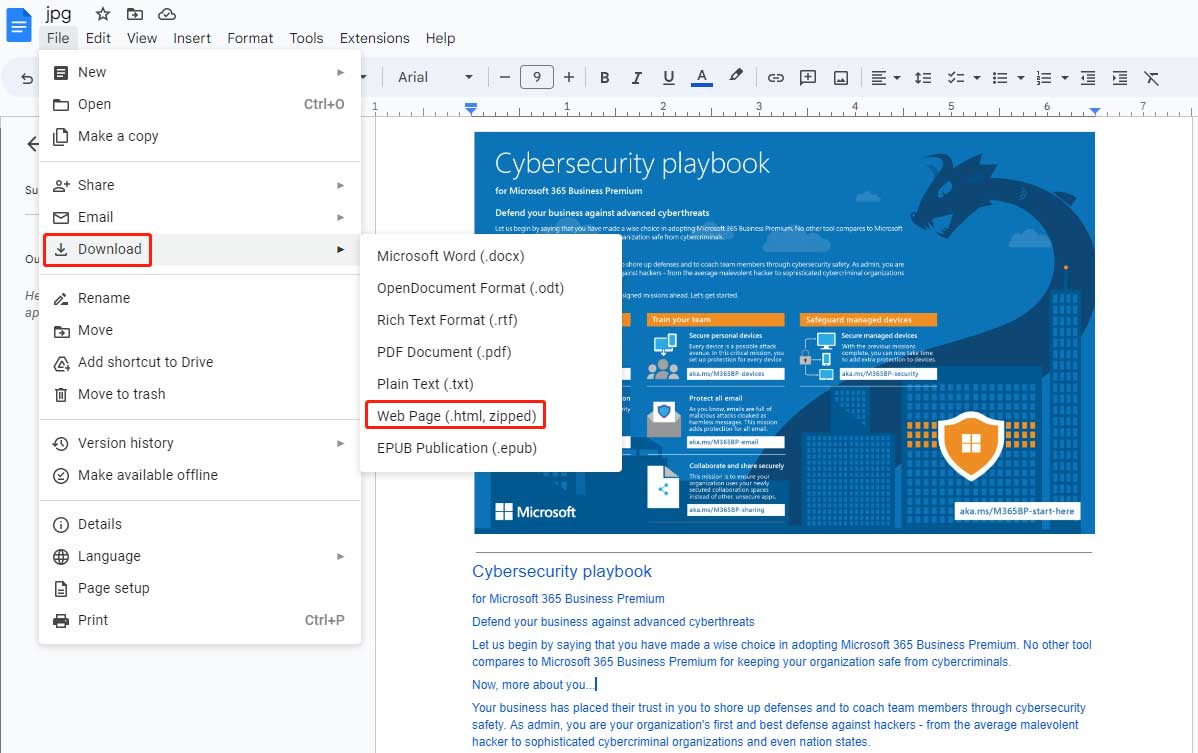
- Click File > Download > Web Page (.html, zipped). You will get a ZIP file. Unzip it and you will find the HTML file.
Way 3. Convert Image to HTML Codes
Some people may want to try converting images to HTML codes. In this case, python tools are needed (img2html for example). Of course, if you know other tools to convert images to HTML codes, you can share them with us in the comment zone.
Way 4. Insert Image to HTML
In most cases, you may not use a whole HTML page to display an image. You may just want to insert an image into an HTML page. How to add an image in HTML? You can use the following syntax: <img src="url" alt="alternatetext">.
You should use the <img> tag inside <body>…</body> tag. The <img> tag specifies an image to be displayed in an HTML document. In this way, images are linked to web pages. The <img> tag creates a holding space for the image.
The <img> tag has two attributes. Src specifies the path to the image (location of the file) and Alt specifies an alternate text for the image. If you want to change the size of the image, you can also add the width and height attributes.
Here are some examples of the syntax:
- <img src=“https://www.partitionwizard.com/images/uploads/articles/2020/07/usb-speeds/usb-speeds-1.png">
- <img src="https://www.partitionwizard.com/images/uploads/articles/2020/07/usb-speeds/usb-speeds-1.png" alt="USB speeds chart">
- <img src="https://www.partitionwizard.com/images/uploads/articles/2020/07/usb-speeds/usb-speeds-1.png" height="50px" width="50px">
Bottom Line
Is this post helpful to you? Do you know other ways to convert image to HTML? Share them with us in the following comment zone. In addition, if you have encountered problems when using MiniTool PDF Editor, feel free to contact us via [email protected]. We will get back to you as soon as possible.
