Though exporting Microsoft Planner data on a PDF is a little difficult, it is feasible by using the proper tools. In this post, MiniTool PDF Editor shows you how to export Microsoft Planner to PDF in 5 available methods.
Do you know how to export Microsoft Planner to PDF? If not, read this post now! It collects 5 available ways to export the Planner data to PDF.
Method 1: Utilize a PDF Printer
Exporting Microsoft Planner to PDF using a PDF printer is straightforward. This method enables you to directly save your Planner data as a PDF from the web app. The following steps show you the process.
Step 1: Head to the Microsoft Planner page and log in with the Microsoft account.

Step 2: Pick the desired plan from the left-hand side panel.
Step 3: Press the Ctrl + P keys to open the print dialog box.
Step 4: Choose Save as PDF as your printer.
Step 5: Adjust the settings based on your needs and click Save. Then select the location to store the PDF.
Method 2: Export Microsoft Planner to Excel and Convert to PDF
You can also export Microsoft Planner to Excel and then convert it to PDF. This is an indirect way to export Microsoft Planner to PDF, but it still works. You can have a try.
Step 1: Similarly, select a desired plan to export from the left-hand side panel after you log into Microsoft Planner.
Step 2: Tap on the ellipsis (…) icon at the top of the plan window and click Export plan to Excel.
Step 3: Then the Excel file will be downloaded to your PC. Navigate to the Download folder on your computer and open the newly downloaded Excel file.
Step 4: Click the File tab in Excel and choose Save as.
Step 5: From the Save as drop-down menu, choose PDF. Besides, configure the location, type the file name for the PDF, and then click Save.
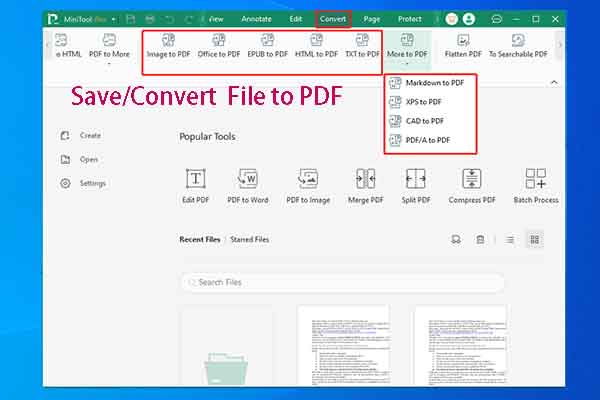
Alternatively, you can also convert Excel to PDF via MiniTool PDF Editor. After entering the main interface of the program, click Convert > Image to PDF. Then drag and drop the downloaded Excel file into the box, configure settings based on your needs, and click the Start button.
As a PDF converter, MiniTool PDF Editor helps you convert Image/Office/EPUB/HTML/XPS/Markdown/CAD/TXT/PDF/A to PDF and vice versa. It also edits/signs/annotates/merges/translates/encrypts PDFs.
MiniTool PDF EditorClick to Download100%Clean & Safe
Method 3: Export Data via PowerShell and Convert to PDF
How to export Microsoft Planner to PDF? An available way is to export data via PowerShell and convert to PDF. Here’re the steps for doing that.
Step 1: Right-click on the Windows icon and then click Windows PowerShell (Admin) from the Start menu.
Step 2: In the Windows PowerShell window, type the following command and hit the Enter key to execute it.
Export-PlannerUserContent -UserAadIdOrPrincipalName <user's AADId or UPN> -ExportDirectory <output location>
Step 3: Open the exported JSON files in a text editor or another software that supports JSON.
Step 4: Copy and paste the content into a Word document.
Step 5: Then save the file as PDF. Alternatively, you can also convert Word to PDF via MiniTool PDF Editor.
- Click on the File tab.
- Hit the Save as option and click Browse.
- In the pop-up window, configure a location for the file, type a file name, and choose PDF from the Save as drop-down menu. Then click Save to confirm the operation.
Method 4: Explore the Planner as Images and Convert PDF
Another available way to export Microsoft Planner to PDF is to export the Planner as images and save as PDF.
Step 1: Open Microsoft Planner and head to the relevant plan.
Step 2: Screenshot the plan content with the Snipping Tool or Snip & Sketch feature on Windows.
Step 3: Save the screenshot on the computer.
Step 4: Then convert the screenshot to PDF by printing it or using MiniTool PDF Editor.
Method 5: Use Third-Party Tools
Third-party tools can help you effectively export the Planner to PDF. You can try it by following the steps below.
Step 1: Choose a tool that supports exporting Planner data to PDF. Some popular tools are listed as follows:
- Power Automate (formerly Flow)
- Integrations with Microsoft Flow and Power BI
- Specialized task management tools with export functions
- PDF readers and editors that can be integrated with Microsoft Planner.
Step 2: Connect to your Microsoft Planner by following the tool’s instructions.
Step 3: Set up the export process to create a PDF document.
Step 4: Execute the export process and download the PDF file.
Conclusion
This post collects 5 ways to export Microsoft Planner to PDF. If you need to do that, apply these methods to complete the operation.


