In this post, MiniTool PDF Editor provides a complete guide for converting Excel to various image formats including PNG, JPG, BMP, GIF, TIF, and more. If you have any of the needs, you can read this post to get the detailed steps.
For some reason, people may need to convert Excel to image. Have you also encountered the same situation? Do you know how to convert Excel to image? If you don’t know the ways, you don’t need to worry. This post provides a full guide to help you complete the Excel to image conversion.
Method 1. Use MiniTool PDF Editor
If you want to convert Excel to image, MiniTool PDF Editor is the tool you need! This feature-rich image converter can help you convert Word, PPT, and Excel to JPG/PNG/BMP/TIF with ease.
In addition to image conversion, MiniTool PDF Editor offers a range of conversion options, including PDF to PDF/A, PDF to PPT, Word to PDF, image to PDF, HEIC to image, and more.
But that's not all. MiniTool PDF Editor also provides a host of PDF editing tools, from changing the text color to adding or replacing pages, creating a table of contents, and removing headers and footers. With this powerful software, conversion between different files can be easier.
Here are the detailed steps for how to convert Excel to image via MiniTool PDF Editor:
Step 1. Click the Download button below to get the MiniTool PDF Editor installation package. Then follow the on-screen instructions to install it on your computer.
MiniTool PDF EditorClick to Download100%Clean & Safe
Step 2. Launch MiniTool PDF Editor and enter into its main interface. Select Batch Process and then click the Image Converter feature in the pop-up window.
Step 3. Go to the Excel to Image tab, and then click Add Files to add the Excel file to the convert list. In addition, you can also drag the Excel file you want to convert to the right panel.
Step 4. Then set the converted options according to your needs. Here are the options:
- Options: You can choose from the "Each Page in Separate Image" feature to convert all Excel pages into pictures individually or select the “Selected Pages in an Image File” feature to convert the selected Excel pages into one image.
- Resolution: You can choose to set the converted image’s resolution to 72dpi or 96dpi.
- Format: You can choose the image formats for the converted image here. It includes PNG, JPG, BMP, and TIF.
- Output Path: You can click the three dots icon here to choose a proper location to save the converted Image.
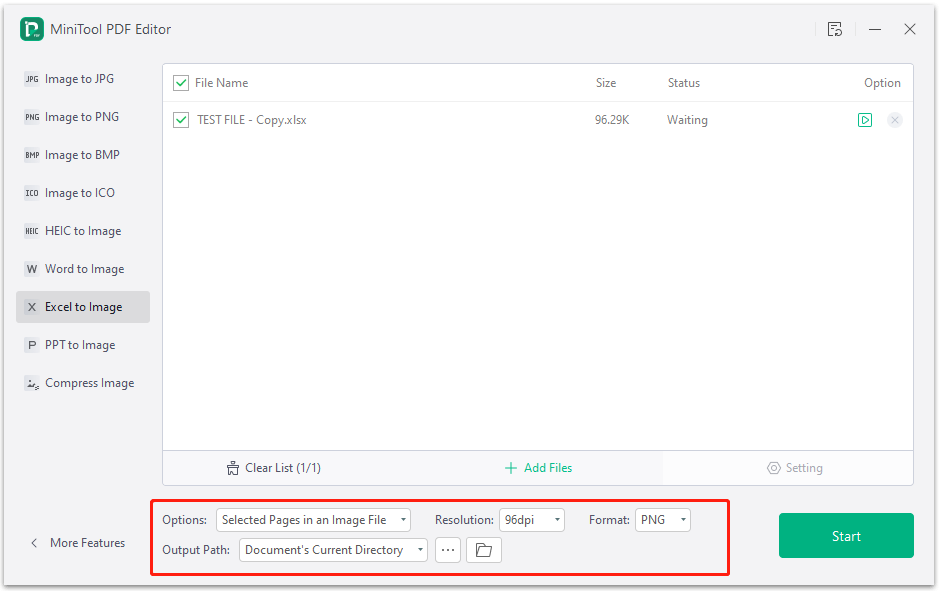
Step 5. After that, click the Start button on the right-bottom of the window to start the conversion.
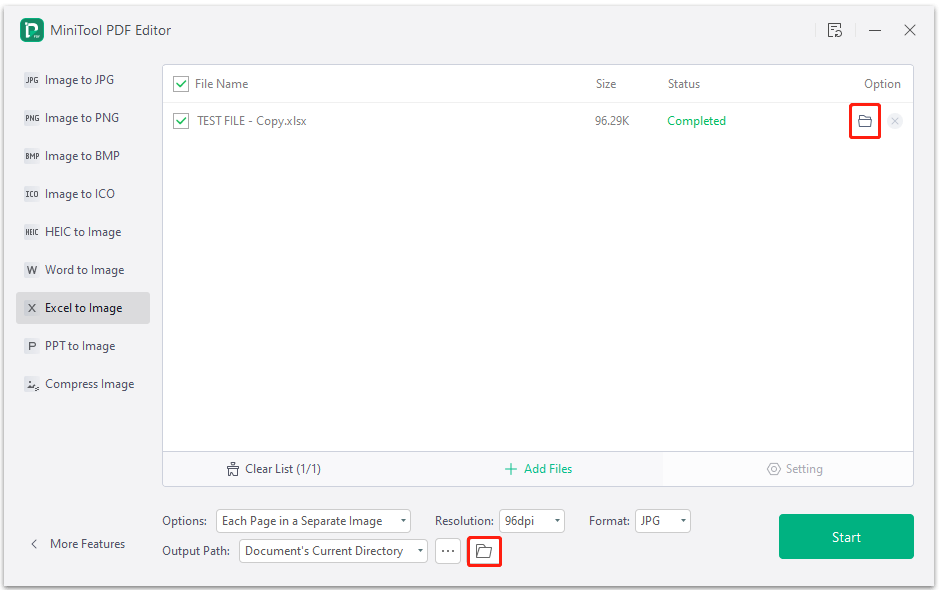
Step 6. Once done, click the folder icon under Options or beside the three dots icon to open the directory of the converted image.
Method 2. Use Copy as Picture Feature in Excel
If you don’t like to download any new apps on your computer, you can use Excel and Word which are already installed on your PC to convert Excel to BMP/TIF/JPG/PNG/GIF. Here are the detailed steps:
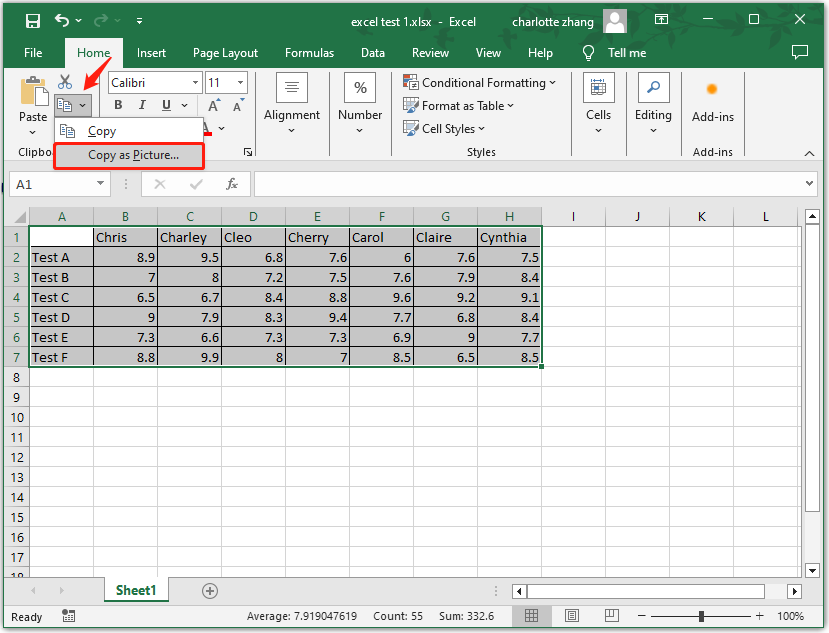
Step 1. Open your Excel file in the Excel, select the area you want to convert to Image. Then, click the down arrow beside the Copy icon, and then select Copy as Picture.
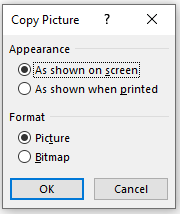
Step 2. In the pop-up window, select As shown on screen and Picture. Next, click OK.
Step 3. Press the Ctrl + V keys simultaneously to paste the image into a Word file. Next, right-click the image and select Save as Picture.
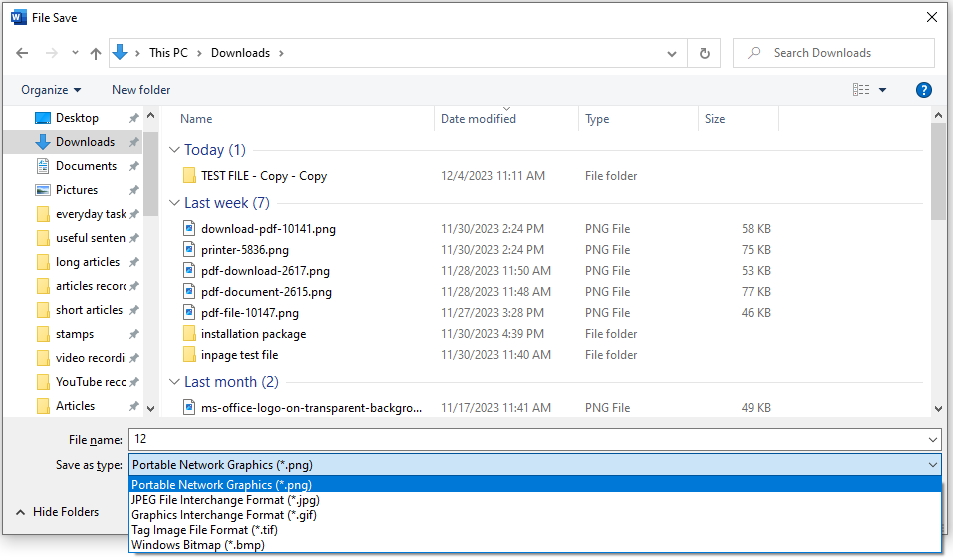
Step 4. In the Save as window, choose a location to save the picture, set the image name, and then choose an image type for the picture from PNG, JPG, GIF, TIF, or BMP file format. If you want to convert Excel to GIF, you can select GIF from the menu. Then click Save.
Step 5. Once done, you can convert Excel to image successfully.
Method 3. Use the Camera Feature in Excel
There is a Camera feature in Excel can help you convert Excel to BMP/TIF/JPG/PNG/GIF as well. If you want to try this way, you can do the following steps:
Part 1. Enable the Camera Tool on Excel
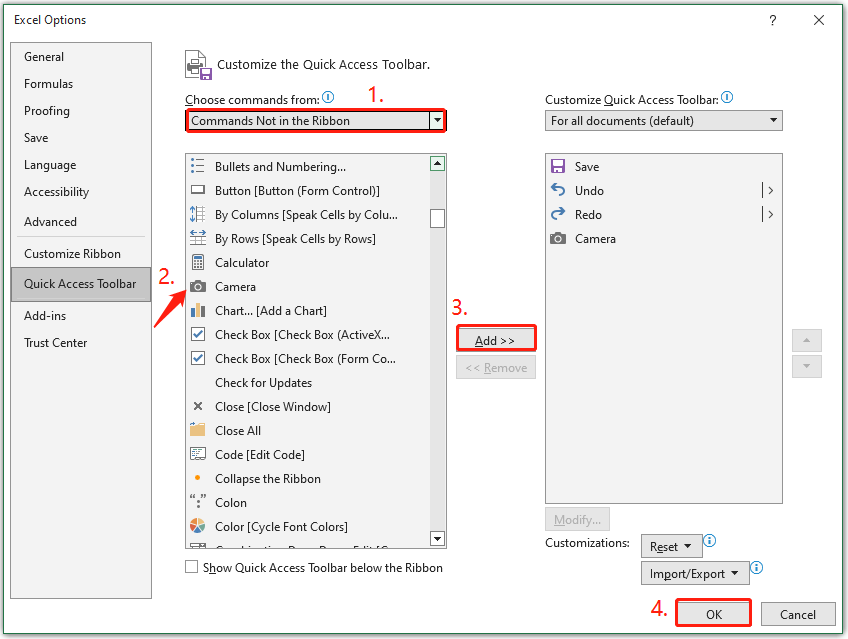
If you want to use the Camera feature on Excel to convert Excel to JPG/PNG or other image formats you need, you need to enable it first. Here’s how to enable it:
- Launch Excel on your PC.
- Select Options from the left pane.
- Go to the Quick Access Toolbar.
- Select Commands Not in the Ribbon from the drop-down menu of Choose commands from.
- Scroll down to select Camera, click Add, and then click OK to save the changes.
Part 2. Convert Excel to Image
Step 1. Open the Excel file, and then select the Excel chart, table, or other data you need in Excel, and then click the Camera icon.
Step 2. Click any place in the Excel worksheet to convert the data from Excel to image format.
Step 3. Copy and paste the created image to another app, and then save it as PNG, JPG, BMP, TIF, or GIF according to your needs.
Method 4. Use Screenshot
You can also use Screenshot to convert Excel to PNG/JPG or any other image type you need. Here’s the guide:
- Open the Excel file.
- Press the Windows + Shift + S keys simultaneously to open the snipping tool.
- Use it to take a snip of the Excel chart, table, or other data you need.
- Next, click the notification on the right bottom to open the screenshot editor.
- You can mark, highlight, or crop the image further in the new window.
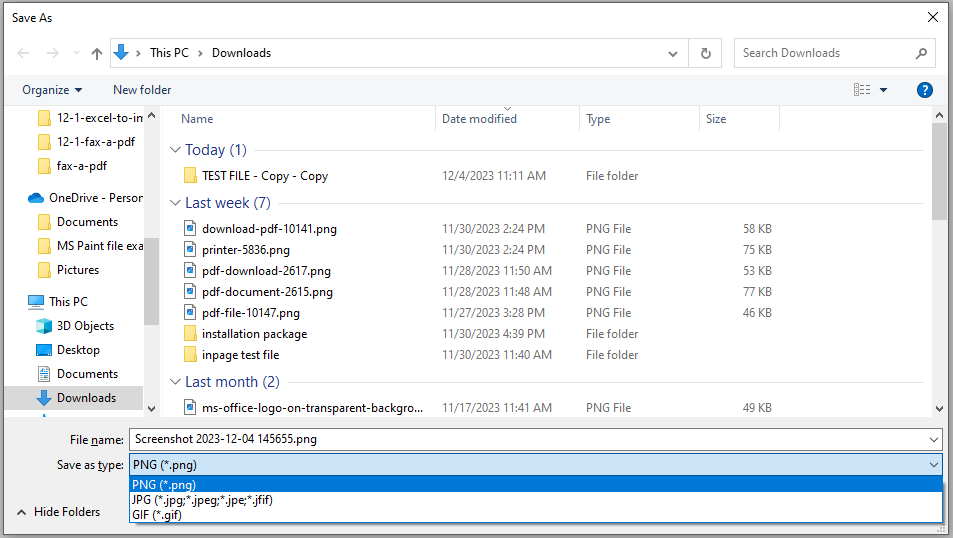
- After that, click the Save icon to open the Save as window.
- Then, select the image type as PNG, JPG, or GIF, choose a location, and click Save.
- Once done, you can convert the Excel to PNG/JPG/GIF successfully.
Method 5. Use Excel to Image Converter Online
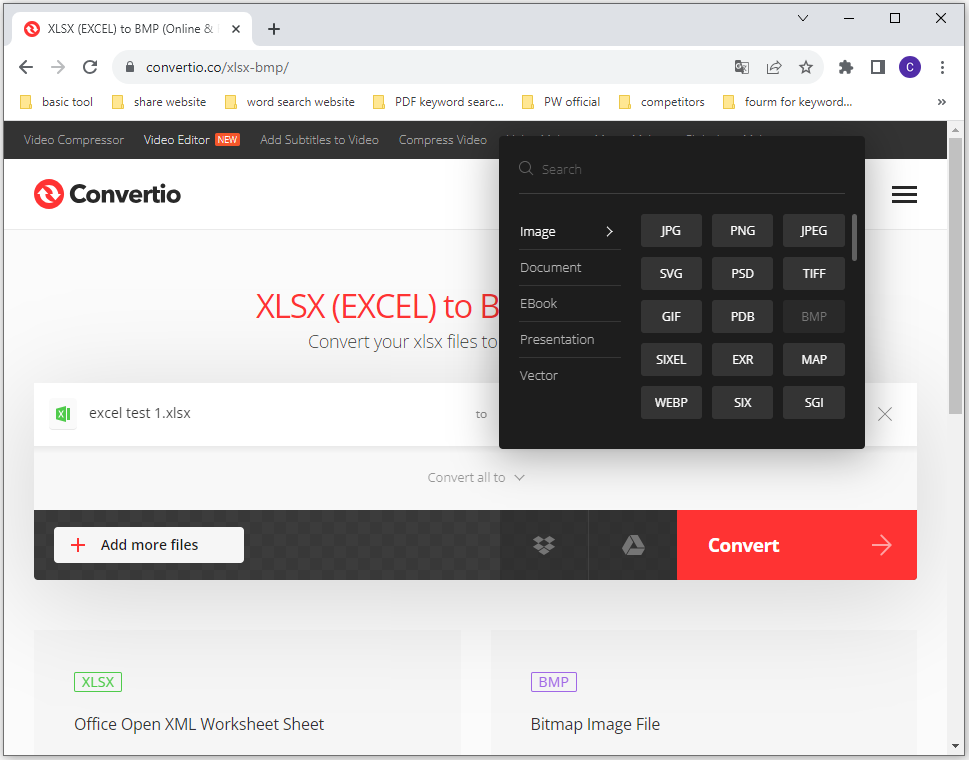
If you would like to convert an Excel file to an image using an online tool, you can search for a converter on the internet. There are several options available, such as Convertio and Zamzar. Here, I take Convertio as an example:
- Navigate to the Convertio official website.
- Upload your Excel file.
- Select which file format you want to convert.
- Next, click Convert.
- Once done, you can complete the Excel to image conversion.
Wrapping Things up
This post focuses on how to convert Excel to image freely. You can choose a desktop application or online tool, but we highly recommend you use the MiniTool application because of its more advanced options.
If you have any questions or suggestions about this topic, please leave them in the following comment zone. Also, you can contact us via [email protected] when you have difficulty using the MiniTool software.