Why Do You Add Margins to PDF Files?
The margin is an area between the main content and page edges. Sometimes, users may want to remove them to make the most of the paper, while sometimes they need to add them for the following reasons.
- Avoid content in PDF getting cut off during printing progress.
- Avoid notes covering or overlapping the original content.
- Align all the content uniformly for PDF files which does not have consistent or uniform margins.
Way 1. Use MiniTool PDF Editor
MiniTool PDF Editor is a professional and reliable PDF editor that allows you to add margins to PDF on Windows with ease by using its Print feature and Corp feature.
Moreover, MiniTool PDF Editor can help you do some editing work on PDF, like adding pages, replacing pages, changing text color, etc. You can also use it to do some conversions between different file formats, like converting PDF to PDF/A, HEIC to JPG/PNG/BMP/TIF, PDF to Publisher, and more.
Here’s how to use MiniTool PDF Editor to add margins:
1. Use Print Feature
Using the Print feature of MiniTool PDF Editor to add margin to PDF is the easiest way. Here’s the guide:
Step 1. Click the Download button to get the MiniTool PDF Editor installation package, and then follow the on-screen instructions to install it on your PC.
MiniTool PDF EditorClick to Download100%Clean & Safe
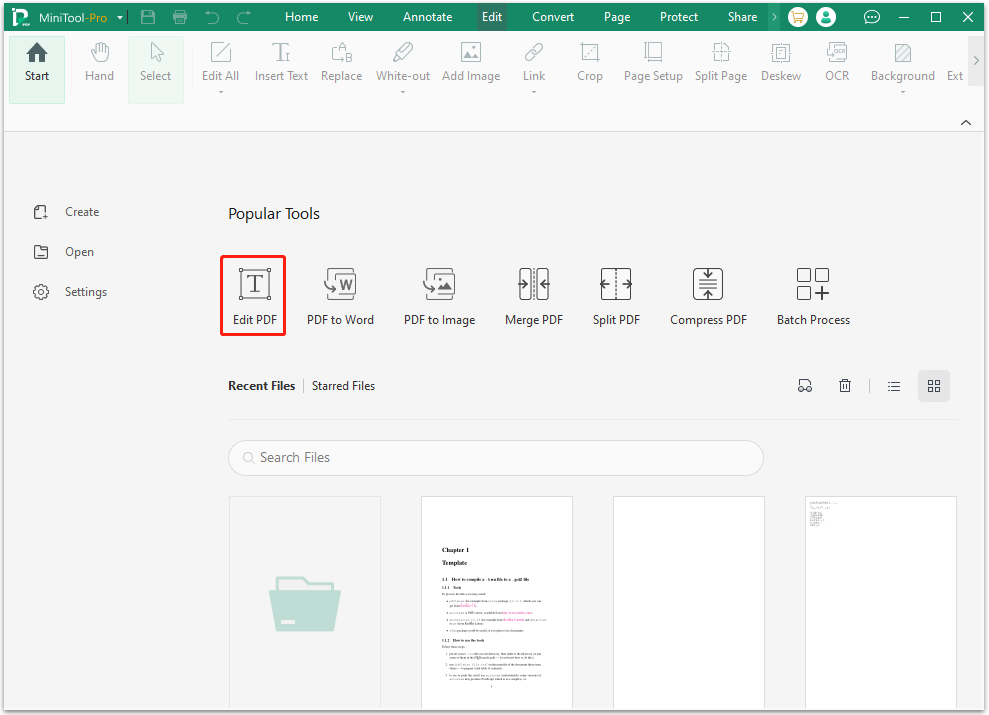
Step 2. Launch MiniTool PDF Editor into its main interface, and click Edit PDF under Popular Tools.
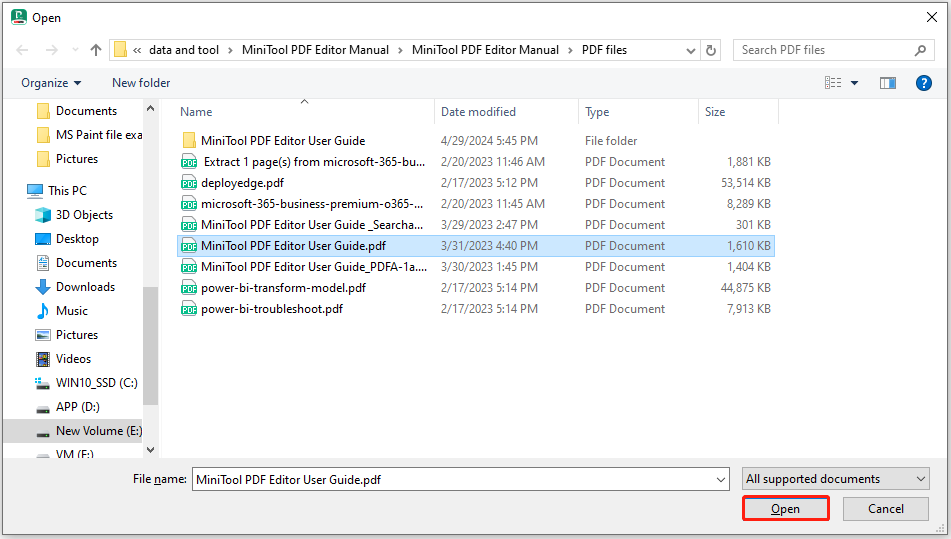
Step 3. In the pop-up window, select the PDF you want set its margins, and click Open.
Step 4. Click the print icon or press Ctrl + P to open the Print window.

Step 5. In the Print window, select Margins in the right panel. Then, set the Top, Bottom, Left, and Right margins according to your needs.
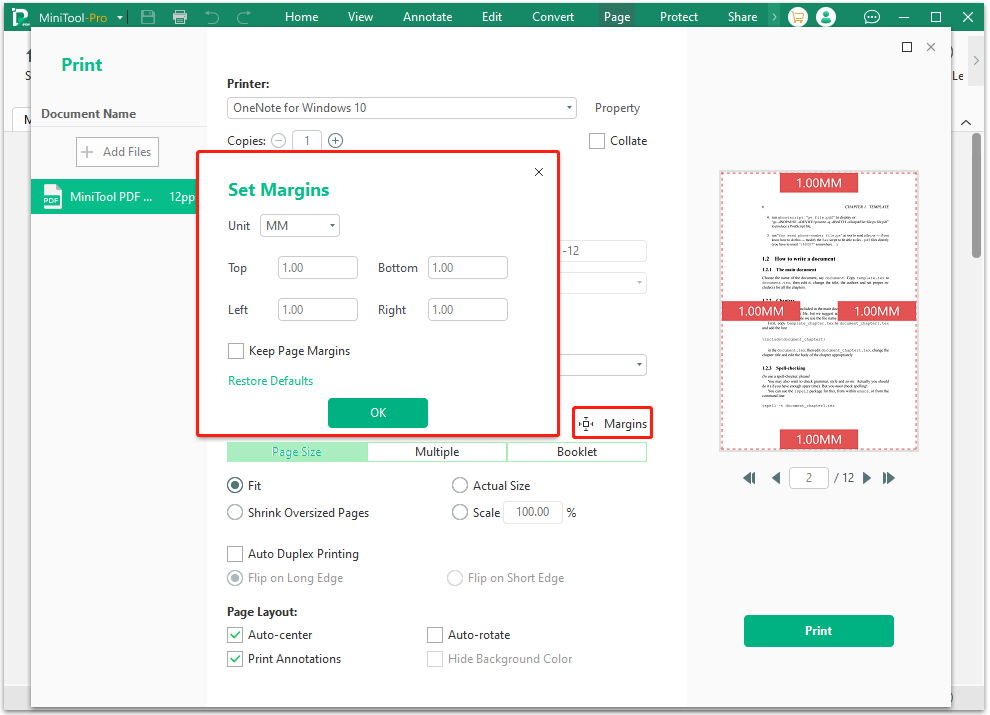
Step 6. Click OK to apply changes. After that, click Print, and then you can get a printed PDF with the margins you’ve set.
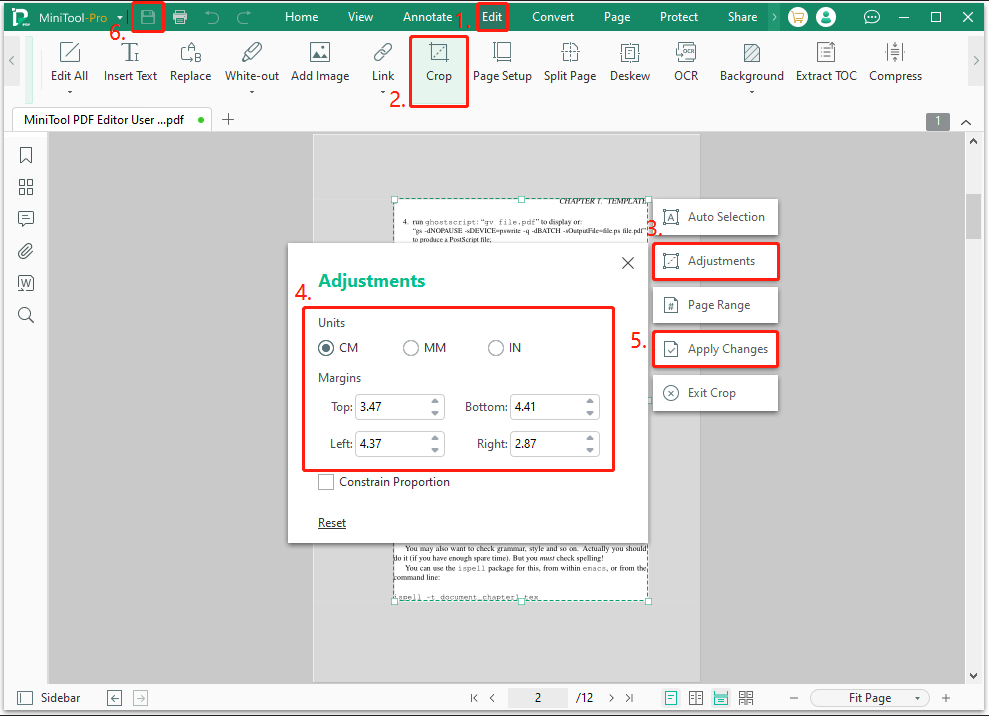
2. Use Crop Feature
In addition to using the Print feature to add margins to PDF on Windows, you can also use the Crop feature. Here are the detailed steps:
- Launch MiniTool PDF Editor on your computer.
- Go to the Edit tab, and select Crop from the menu.
- Click Adjustments and adjust the values of Margins in the Adjustments dialog.
- Next, click Apply Changes to save the changes.
- After that, click the Save icon on the top left corner or press Ctrl + S to save the changed PDF on your computer.
Way 2. Use Adobe Acrobat Pro DC
If you have already installed Adobe Acrobat Pro on your PC, you can follow the steps below to add margins to PDF as well:
Step 1. Open the PDF that you want to add margins in Adobe Acrobat Pro DC.
Step 2. Click Tools from the top toolbar, and then select Organize Pages in the Create & Edit section.
Step 3. Click More and select Set Page Boxes from the drop-down menu.
Step 4. Under the Change Page Size section, choose Custom, and then enter the needed margin value here. Next, click OK to save the changes.
Step 5. Save the changed PDF to your computer.
Besides, you can also try this way to add margins to PDF on Adobe Acrobat Pro DC:
- Open the PDF file in Adobe Acrobat Pro DC.
- Click the Print icon to open the Print window.
- Select Paper Size, and then set the page margin value here.
- After that, click OK to save the changes.
Way 3. Use Previews (On Mac)
If you are a Mac user and want to add margins to PDF on Mac, you can try using the default feature Previews to help you do the operation. To do that, you can do the following steps:
Step 1. Right-click the PDF that you want to add margins, and select Open With > Preview (default).
Step 2. Click Tools, and then choose Show Inspector from the drop-down menu.
Step 3. In the pop-up Crop window, set upper, lower, left, and right margin values by adjusting values of Left, Top, Width, and Height.
Step 4. After that, save the PDF to your computer. Then you can add margins to PDF on Mac successfully.
Way 4. Use Online PDF Editor
If you don’t like to download any PDF editors on your computer, you can also choose to use an online editor to help you add margins to PDF online. There are many online PDF editors on the Internet, you just need to choose the one you like. Here, I take PDFgear as an example:
- Navigate to the PDFgear official website.
- Upload the PDF in which you want to add margins to this website.
- Click the Print icon on the top right corner.
- In the pop-up window, click More settings.
- Select Custom from the drop-down menu of Margins.
- Drag the positioning line to adjust the values of margins.
- Set other settings according to your needs.
- After that, click Print and save this changed PDF to your computer. Then you can add margins to PDF online successfully.
In Conclusion
How to add margins to PDF? Now, you may already know the answer. This post provides 4 practical and simple ways to add margin to PDF. If you also need to add margins to your PDF, try the above ways.
In addition, if you encounter any issues while using MiniTool PDF Editor, please feel free to contact us via [email protected]. We will send it back as soon as possible.
About The Author

Position: Columnist
Charlotte is a technology columnist with a strong focus on the Windows operating system, specializing in disk management, backup, and data recovery. She is passionate about analyzing computer errors, identifying root causes, and delivering practical solutions. In her free time, she stays updated on the latest developments in computer systems and hardware while continuously learning new technologies to broaden her expertise. Her writing style is clear and easy to understand, making complex technical topics accessible even to users with limited computer knowledge.