Do you want to know how to compress Word documents? If you are looking for a way to help you do this, you come to the right place. In this post, MiniTool PDF Editor provides a full guide about this. You can have a try.
Why Need to Compress Word Document?
The Word file is created by Microsoft Word with .docx and .doc as its filename extensions. This kind of file format is widely used in work and life. However, there are many factors that may increase the need to compress Word file, including:
- You need to save space on your device.
- You need to share them with your friends on the internet, but the Word file size is too big.
- You want to decrease the time that you spend uploading or downloading the Word file.
- …
In a word, there are various reasons that may cause you to have the idea of compressing Word files. If you want to learn how to compress Word on a computer with Windows, please continue reading.
How to Compress a Word Document?
How to compress a Word document? MiniTool PDF Editor is a professional and feature-rich Word compression tool.
With MiniTool PDF Editor, you can not only do Word compression, Excel compression, PDF compression, and PPT compression but also do some PDF editing work, such as changing text color, adding pages, removing header and footer, replacing PDF pages, adding TOC to PDF, etc.
In addition, you can also use it to converting PDF/A to PDF, converting HEIC to PNG/JPG/TIF/BMP, converting PDF to black and white, converting PDF to Word/TXT/PDF/PPT/EXCEL, and so on. Here are the detailed steps on how to compress Word document:
Step 1. Click the Download button below to get the MiniTool PDF Editor installation package, and then follow the on-screen instructions to install the program on your PC.
MiniTool PDF EditorClick to Download100%Clean & Safe
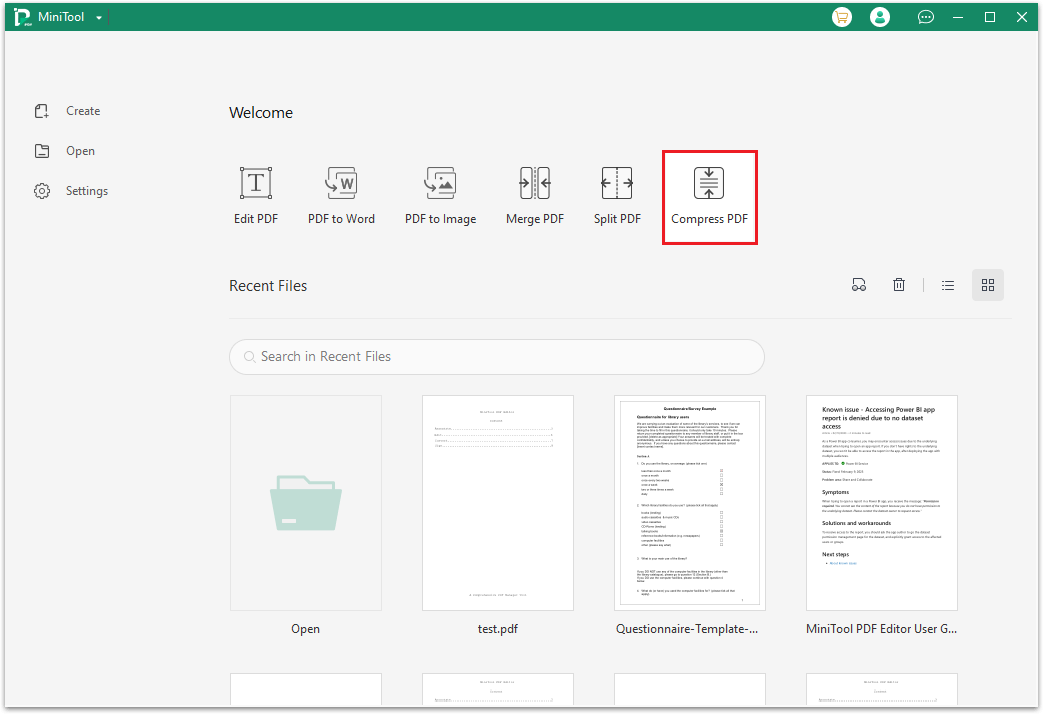
Step 2. Launch into its main interface and click the Compress PDF feature, just as the picture shows.
Step 3. To access additional features, simply click on "More Features" located at the bottom left corner of the pop-up window.
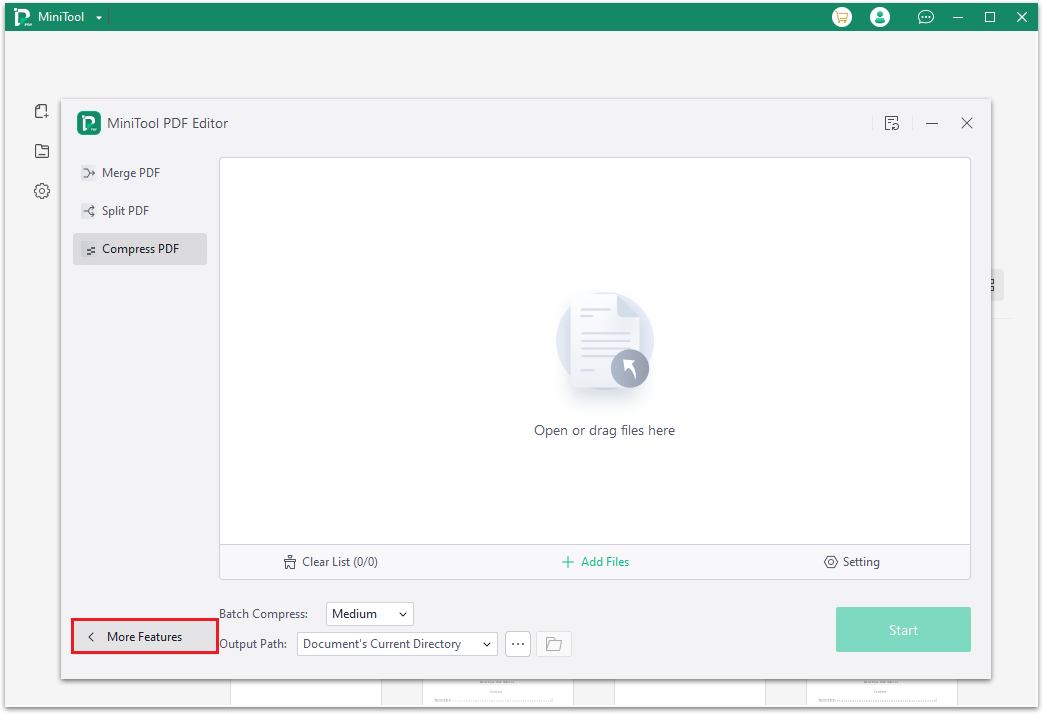
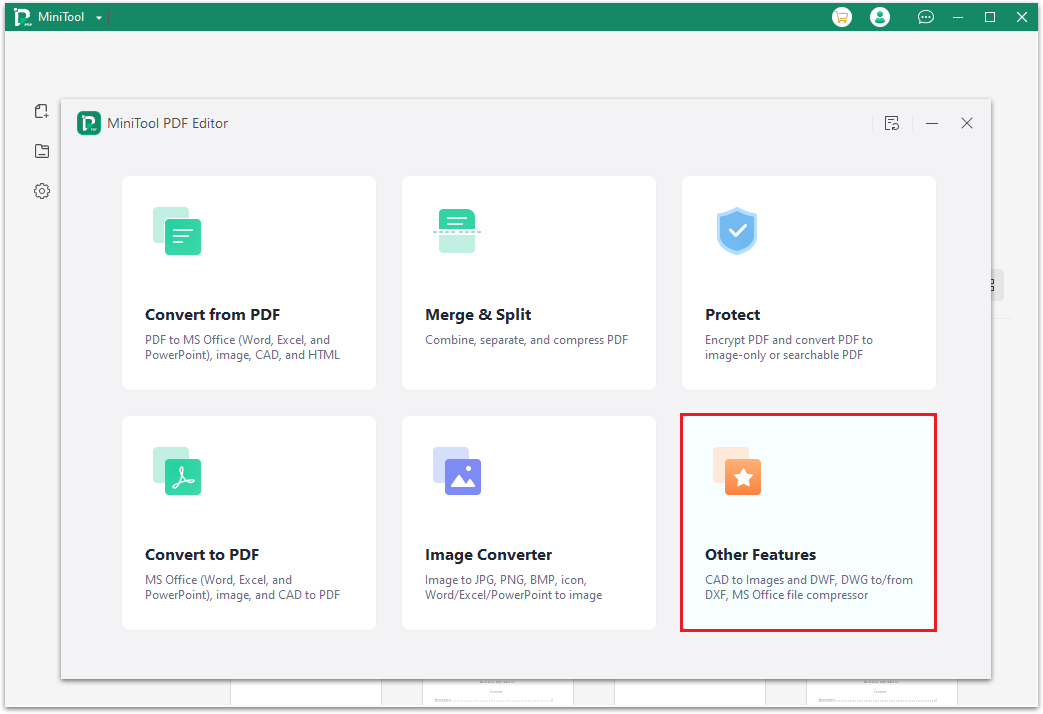
Step 4. In the features window, there are six categories of features to choose from. You should select the Other Features category on the second line.
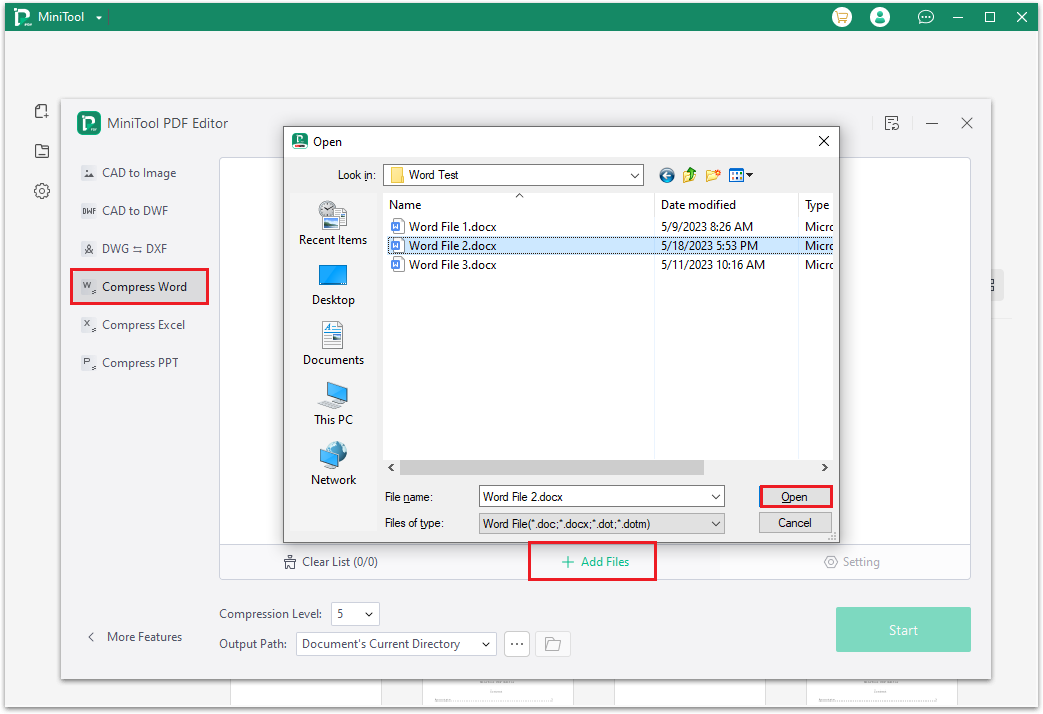
Step 5. Select the Compress Word tab from the left panel and select Add Files to open the file explorer window. Next, choose the desired Word file and click the Open button to proceed.
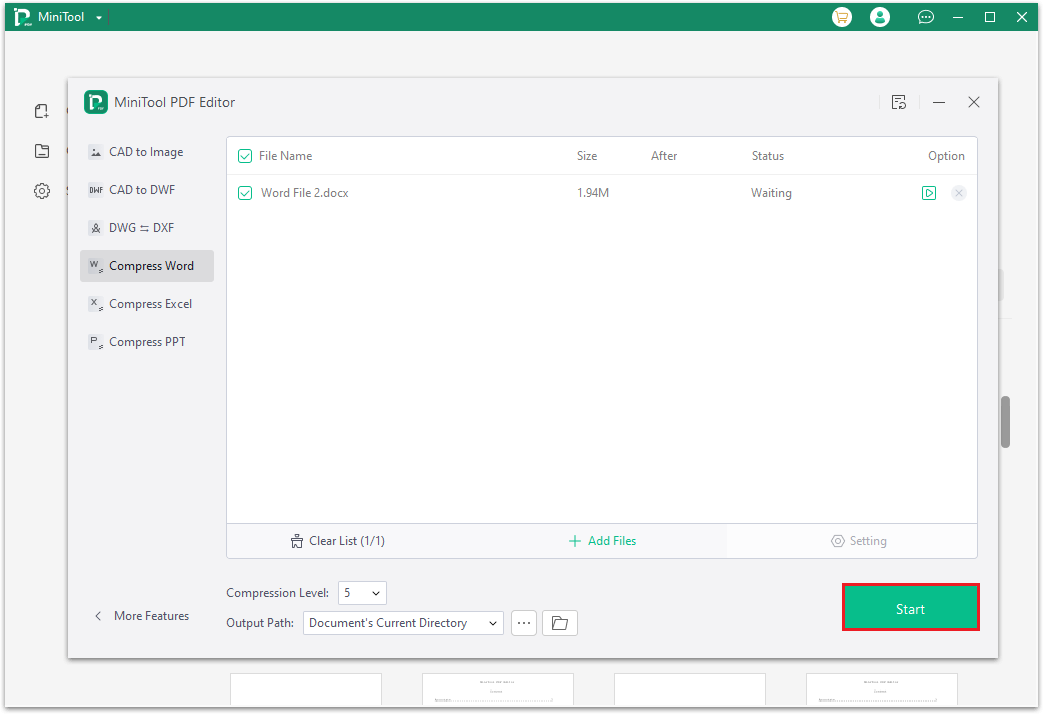
Step 6. Choose the corresponding number from the drop-down menu of Compression Level. Then, select a save location for the compressed Word file by clicking on the three-dot icon next to the Output Path. Finally, hit the Start button to initiate the compression process.
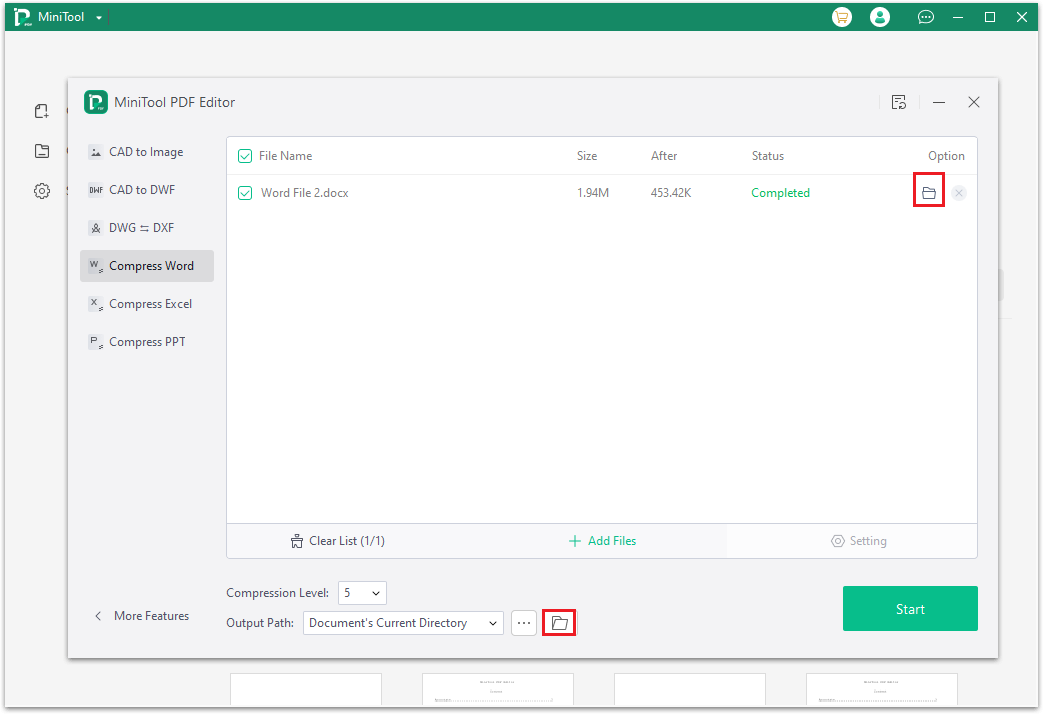
Step 7. After the compression process is complete, you can access the file by clicking on the Open directory icon located next to the Output Path or under Option.
Other 5 Methods to Reduce Word File Size
In addition to reducing the size of Word file by compressing Word, you can also use some other ways to reduce Word file size. For example:
#1. Save the Word file with the .docx format.
The .docx format is an updated version of .doc that takes up less space on your device. To convert a Word file to .docx, simply open it in Microsoft Word, select the File tab, click Save as, choose a location to open the Save as window, and select .docx as the format to save it in.
#2. Compress pictures in your Word file.
Compressing the pictures that you insert into a Word file can help you reduce the file size too. To compress pictures’ size, you just need to do open the Save As window like the first method and click Tool. Then select Compress Pictures, and then choose a proper resolution. Then click OK and click Save.
#3. Set to save pictures at lower resolution.
Lowering the picture resolution that you insert can also reduce Word file size. Here are the steps you need to follow:
- Open the file in Microsoft Word.
- Go to File > Options > Advanced.
- Look for the "Image Size and Quality" section and tick the "Discard editing data" box while unchecking "Do not compress images in file".
- Then, select 150 PPI or a lower resolution from the "Default resolution" option.
- Finally, click OK to save the changes.
#4. Remove font embed.
Embedding fonts in a Word file will make it take up more space. So, you can try removing the font embed to reduce its file size. To do that, you just need to open the file and go to File > Options > Save. Next, uncheck "Embed fonts in the file", and click OK.
#5. Stop tracking changes.
If you have enabled tracking changes in Word, it will increase the file size, too. In this case, you can try stopping tracking changes to reduce the file size. To do that, you just need to open the file, go to Review > Tracking, and then click Track Changes.
Have a Try Now
This post focuses on how to compress Word documents freely. You can follow the guide in this post to compress Word file to reduce the size of your Word file.
If you have any questions or suggestions about this topic, please leave them in the following comment zone. Also, you can contact us via [email protected] when you have difficulty using the MiniTool software.
