How to convert an image to Excel? If are curious about this, you come to the right place. In this post, MiniTool PDF Editor provides you with a step-by-step guide for this conversion.
Have you ever received a spreadsheet from a friend but it was in JPG or PNG image format because they scanned a printed copy or took a screenshot? Working with this type of data can be inconvenient, and you may want to convert it to Excel.
Can You Convert Image to Excel?
Is it possible to convert an image to Excel? Absolutely! To achieve this, you'll need to select a suitable image to Excel converter that meets your requirements. Download and install it on your computer. Once installed, the conversion process can be easily accomplished.
How to Convert Image to Excel?
How to convert image to Excel? MiniTool PDF Editor is a professional and feature-rich PDF image to Excel converter that can help you easily convert images to Excel.
With MiniTool PDF Editor, you can do many conversions between different file formats, like converting HEIC to JPG/PNG/BMP/TIF, converting PDF/A to PDF, converting PDF to Google Docs, converting image to PPT/Word/Excel/PDF, and so on.
In addition, it allows you to do many editing works on PDF files, such as removing headers and footers, changing the text color, replacing/adding pages in PDF, creating a table of contents, renumbering the pages, etc.
However, the MiniTool image to Excel converter doesn’t offer a direct operation to help you do this conversion. So, this operation will be divided into two parts. Here’s the full guide on how to use this image to Excel converter to complete the conversion.
Part 1. Convert Image to PDF
To begin, the first step is to convert image to PDF. Here are the detailed steps on how to convert image to PDF via MiniTool PDF Editor:
Step 1. Click on the Download icon below to get the package of MiniTool PDF Editor, run the executable file, and follow the on-screen prompts to install it on your PC.
MiniTool PDF EditorClick to Download100%Clean & Safe
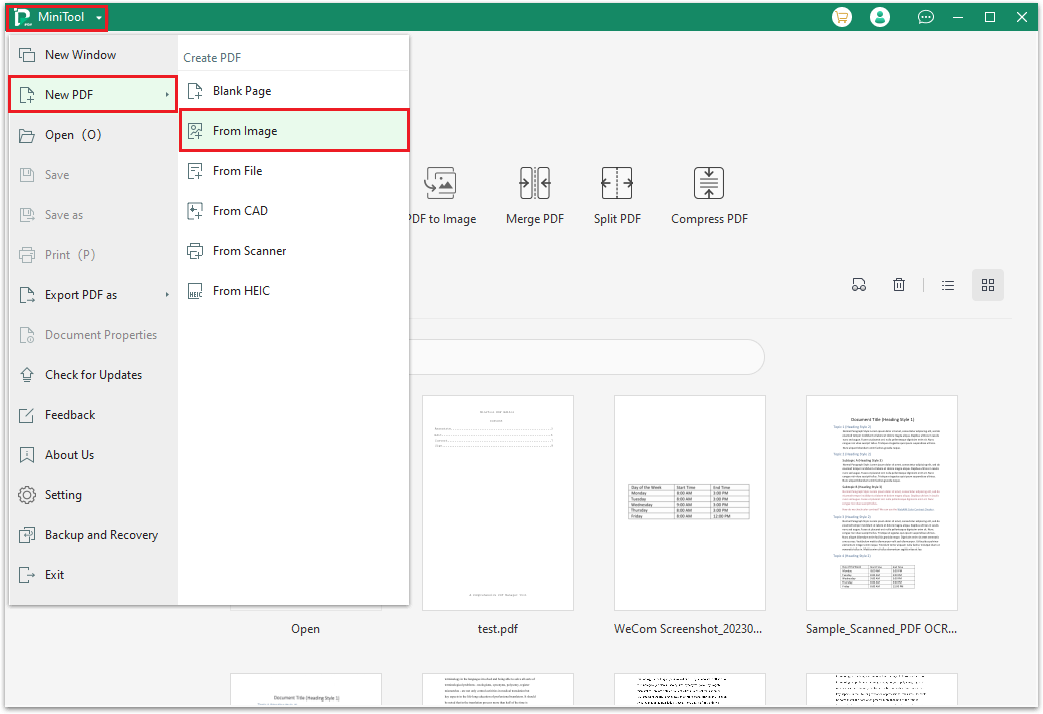
Step 2. Launch into its main interface. Then, select MiniTool > New PDF > From Image to open the image to PDF conversion window.
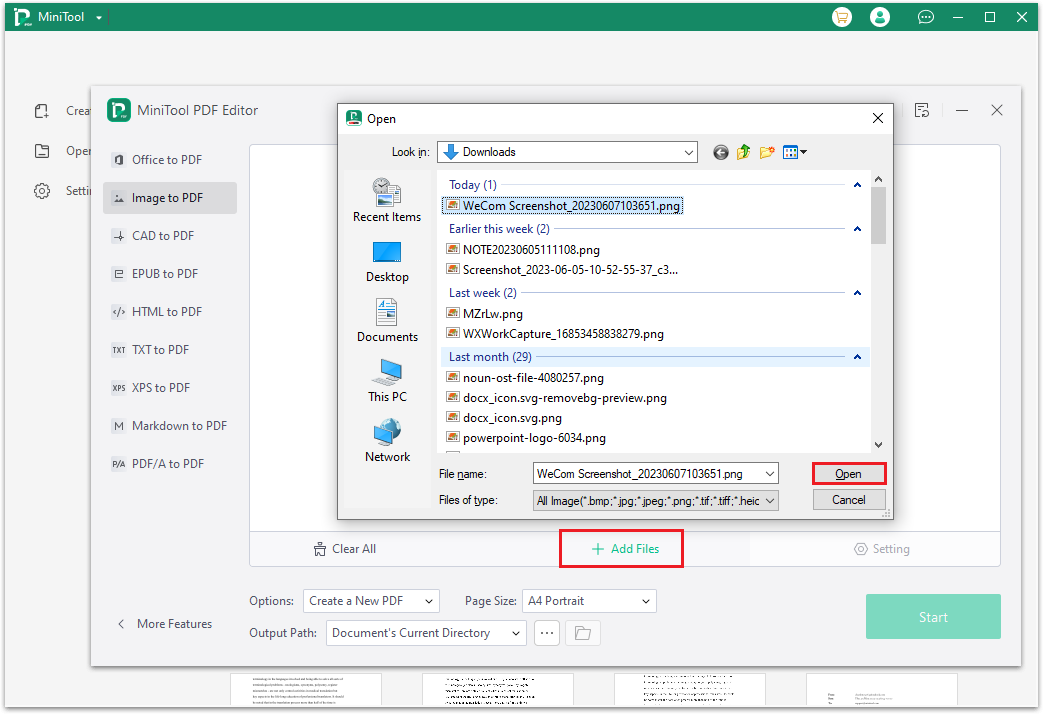
Step 3. In the image to PDF conversion window, click Add Files or click the file icon in the blank area to open the file explorer window. Next, select your target image and click Open to add it to the conversion list.
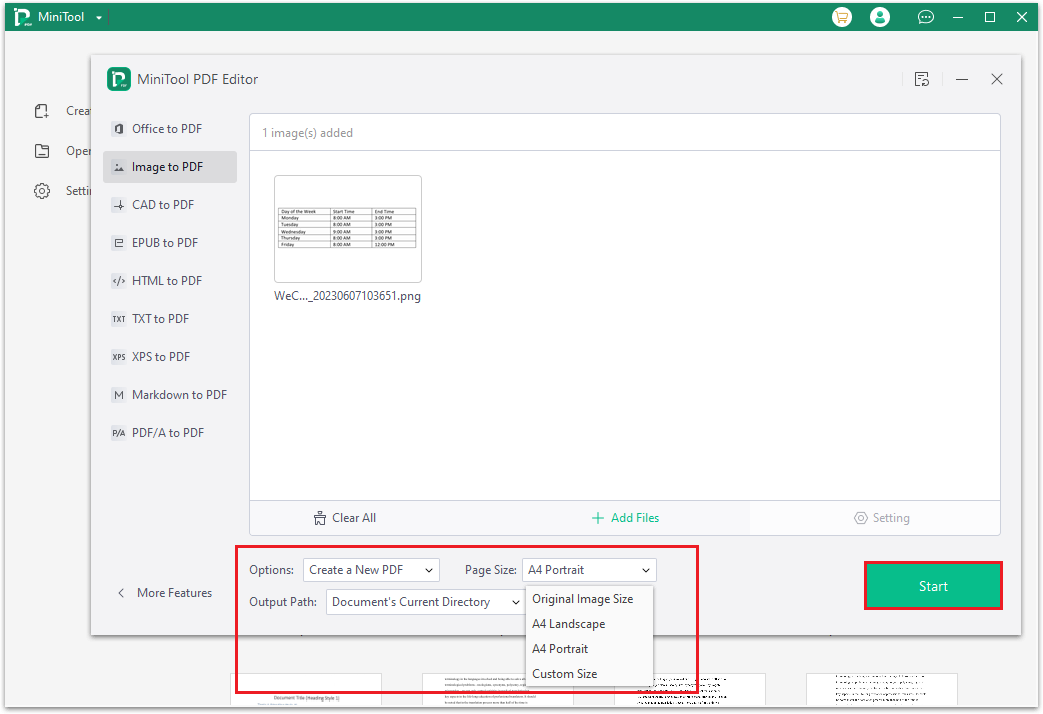
Step 4. Select a proper option from the drop-down menu of Options according to your needs, choose a proper size from the drop-down menu of Page Size, and then select a location to save the converted PDF file from Output Path. After that, click the Start button to start the conversion process.
"Create a New PDF" converts all the pictures in the conversion list into a single PDF file.
"Create Multiple PDF" converts multiple pictures in the conversion list into separate PDF files.
Step 5. After the conversion is complete, the converted PDF will open automatically in MiniTool PDF Editor.
Part 2. Convert PDF to Excel
After you complete the image to PDF conversion, you can continue to convert the converted PDF to Excel with below steps:
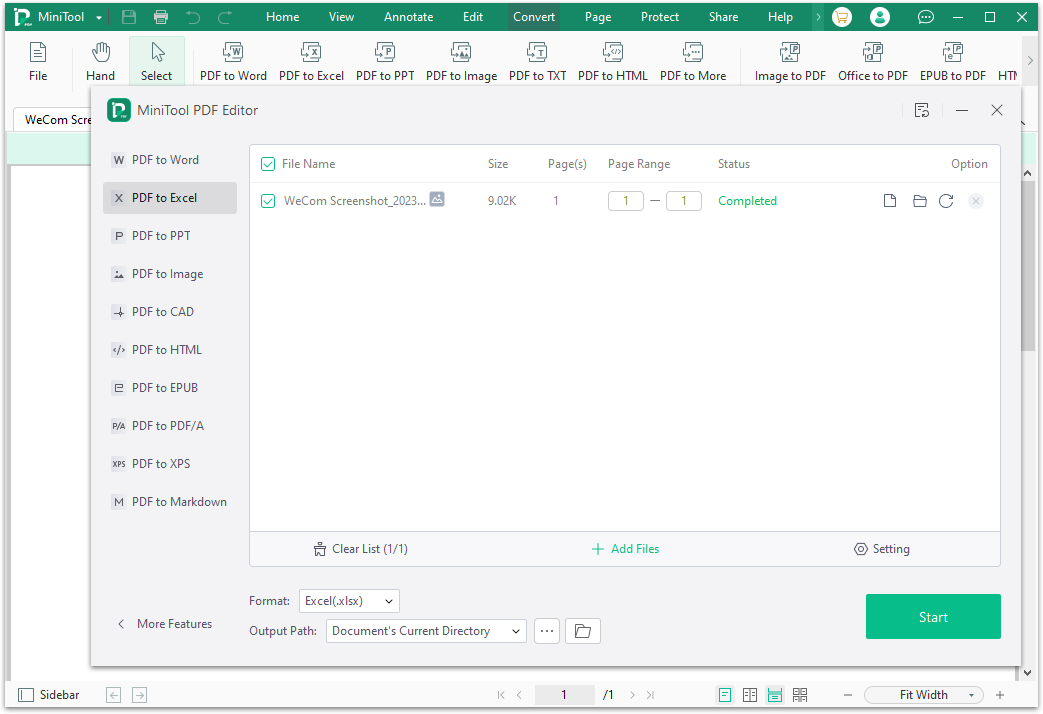
Step 1. Navigate to Convert > PDF to Excel to open the conversion window, and then select a location to save the converted Excel file from Output Path. Next, click the Start button.
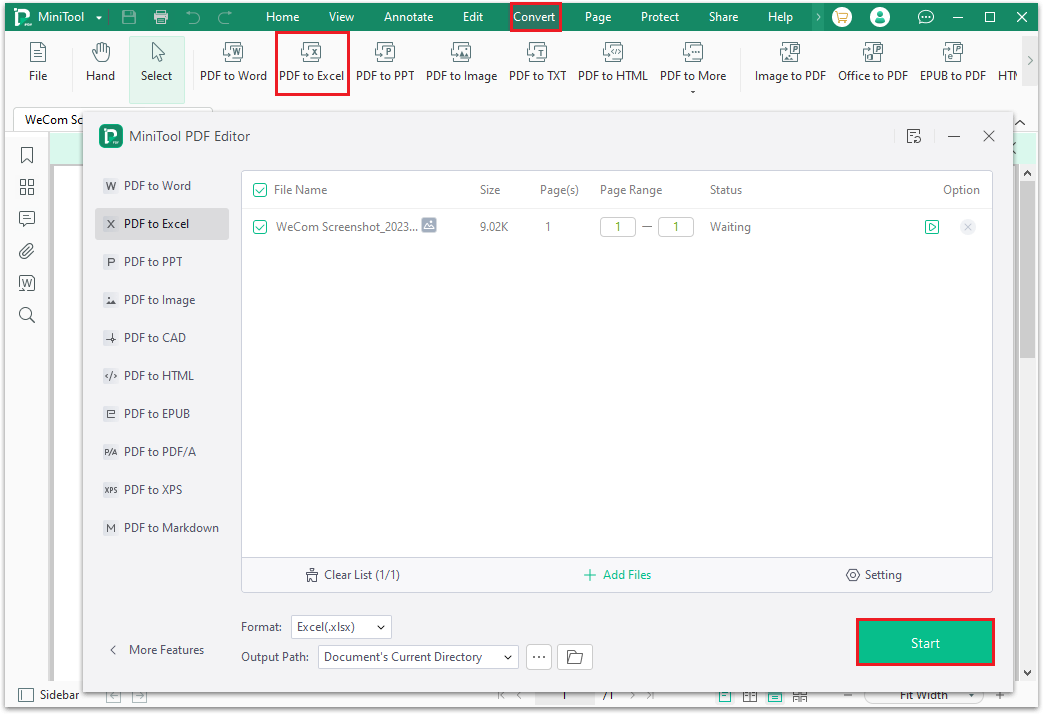
Step 2. Once the conversion process is done, you can see that the converted Excel file is opened automatically in Microsoft Excel if you have installed Microsoft Excel on your PC. Besides this, you can also click on the Open directory icon next to Output Path or under Option to go to its location on your PC.
Wrapping Things up
How to convert image to Excel on Windows? Now, I believe that you already have known the answers. If you have any other opinions about image to Excel conversion, please share them with us in the following comment area.
Besides, if you have any questions when using MiniTool PDF Editor, please feel free to contact us via [email protected] and we will get back to you as soon as possible.